Designing a Canvas Homepage
1.) Getting Started with a New Course
When starting a New Course in Canvas, I'd first reccommend that you make sure to update your profile with the appropriate information, including your name, title, biography, etc. Once that information has been updated, save and then navigate back to your Dashboard.
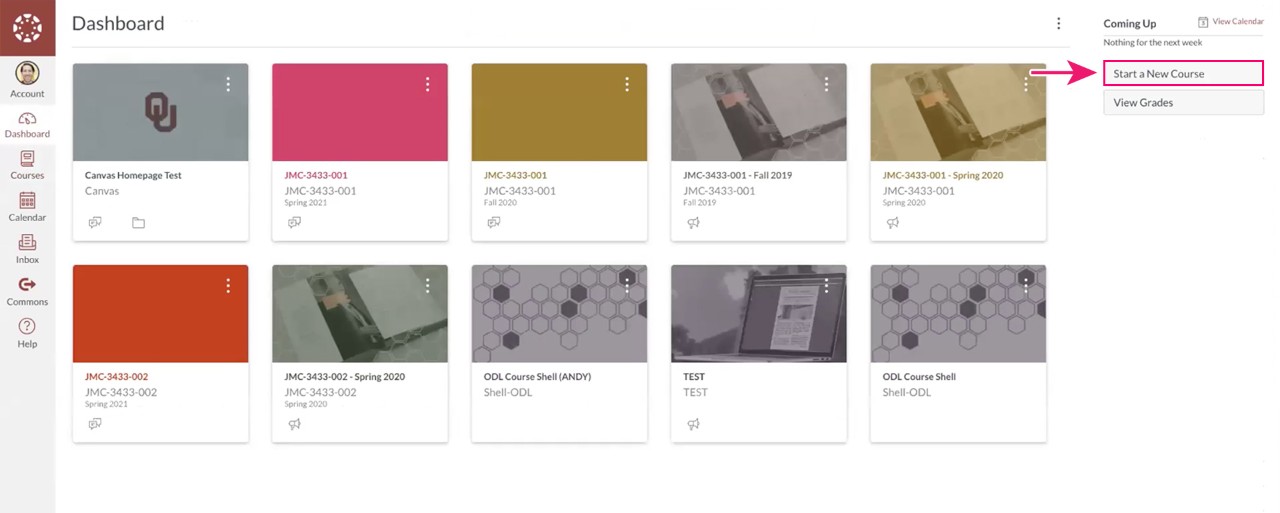
Here is where you can click "Start a New Course" in the upper right-hand corner of your Dashboard page (see figure 1a). Once you do that, a pop-up appears which will prompt you to name your new course. Name it and click "Create Course".
Once you've created the new course, you'll see a default Home Page for your course. Here is where you can "Choose Home Page" by clicking that option in the upper right-hand menu (see figure 1b).
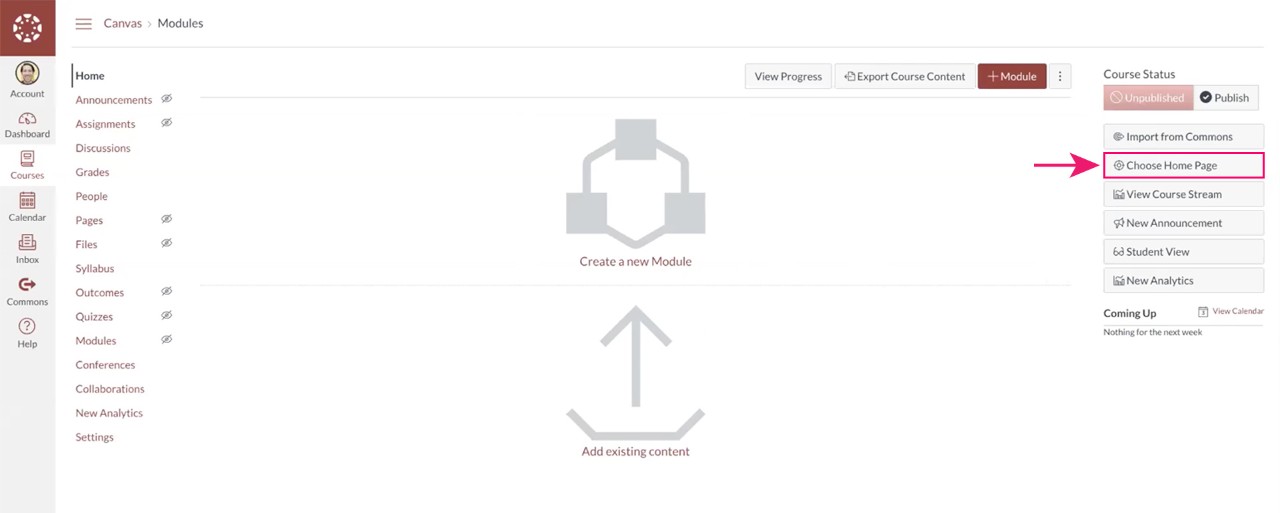
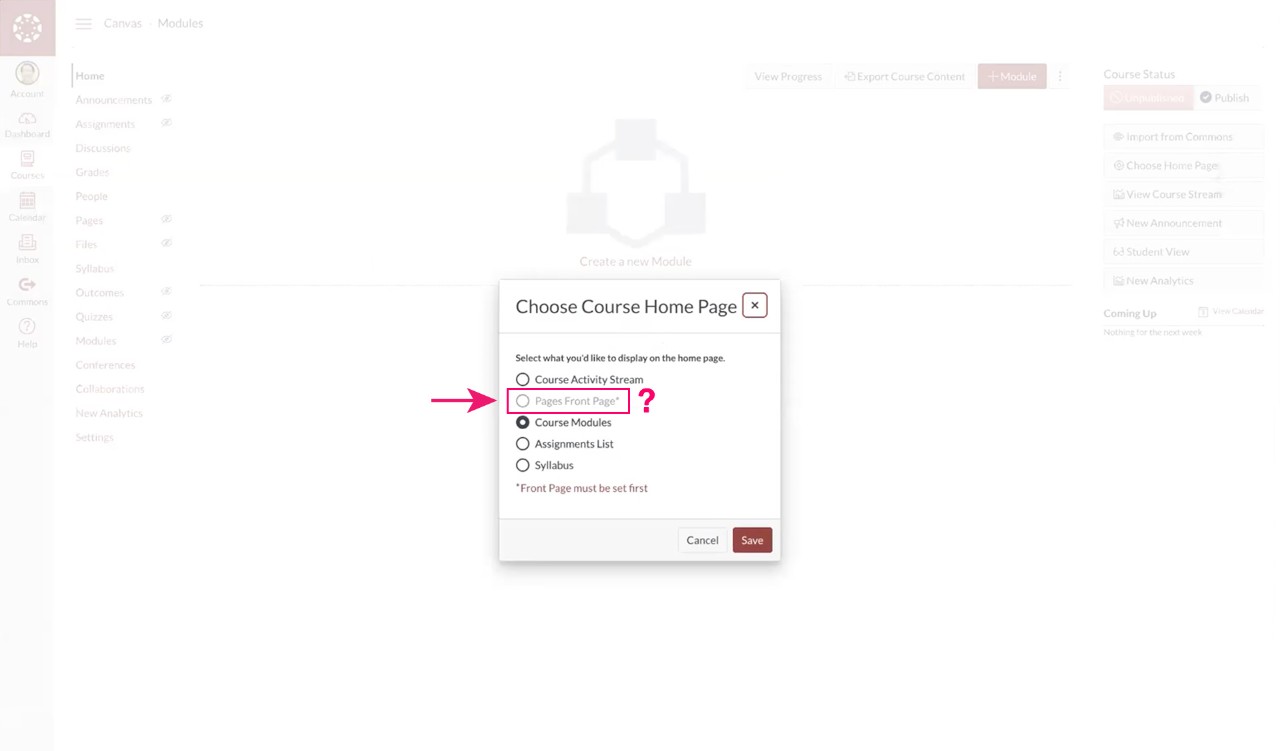
Clicking Choose Home Page will open a pop-up box where you can select from a list of options as what you want to set as your homepage. Your options are to select the Course Activity Stream, Pages as Front Page, which involves creating a page that you'll actually have as the homepage – this is how we’re going to setup our homepage. You also have Course Modules, your Assignments List, or a Syllabus.
Because this is a new course and you haven't built any pages yet, the option to choose Pages as Front Page is grayed out. More on that in a minute. Go ahead and keep your selection as Course Activity Stream for now and click save (see figure 1c).
2.) Build a New Page for your Homepage
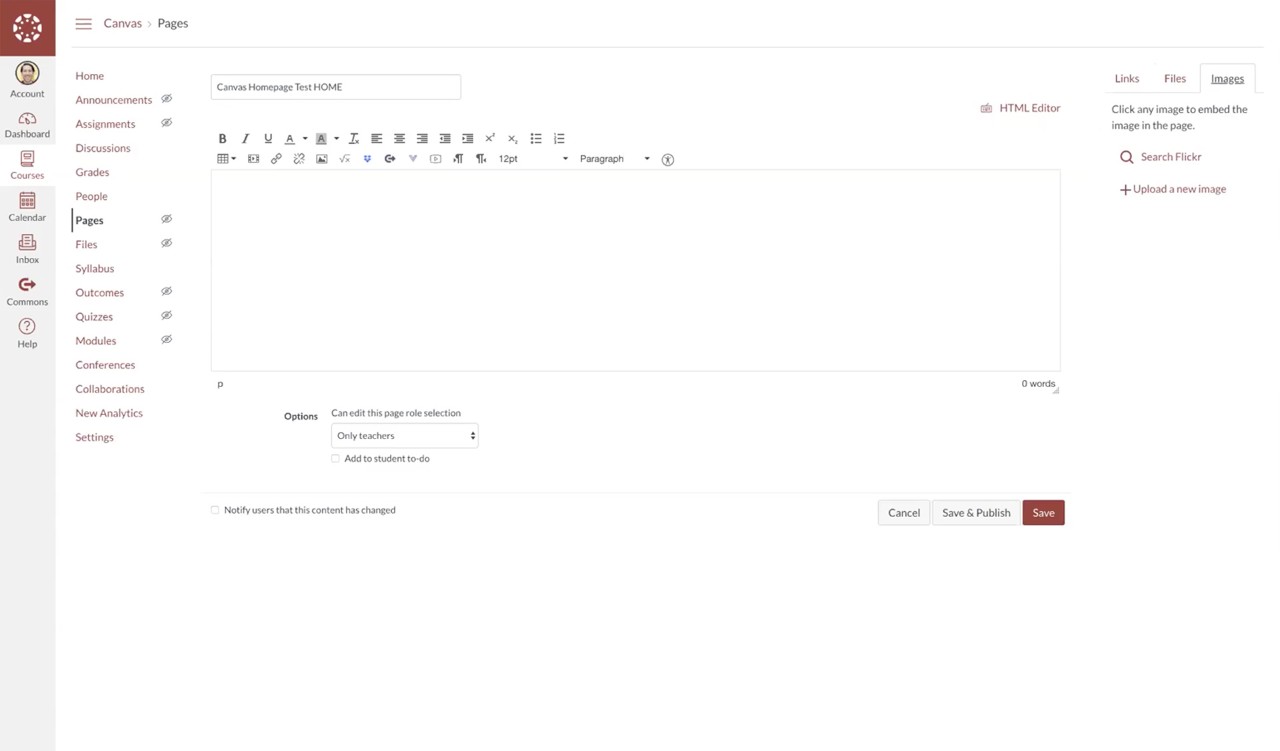
In order to have a homepage, you need to first build a new page within your course. To do this, navigate to your course navigation menu on the left-hand side and choose Pages. Since no pages have been created, this will bring up a blank page (figure 2a) with a rich text editor ready to be populated. The reason that you want to use a page as your course homepage is because it allows you to create a resource in which you can add links, images, videos, and more, and then share them with students easily. Remember that your homepage will be the most visited page of your course, so put some thought into determining what you want yours to be.
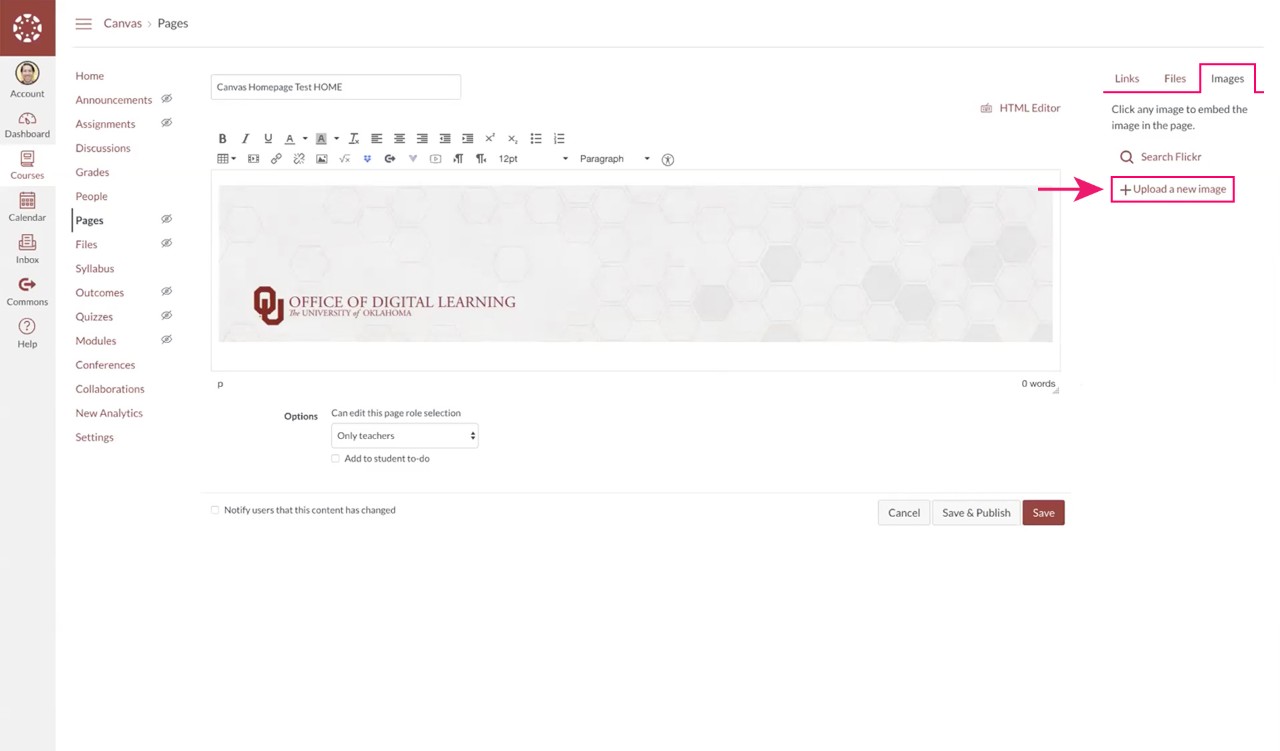
Once you're on your new page, you can start adding text by typing directly into the blank text field. You also have some options in the upper right-hand corner which include adding links, files, and images. Choose "Upload a new image" to add a course image that will serve as your main graphic for the course (figure 2b). I've chosen an image that represents our office, The Office of Digital Learning. Think of this image like a website header, something that will easily remind the students of the course that they're in.
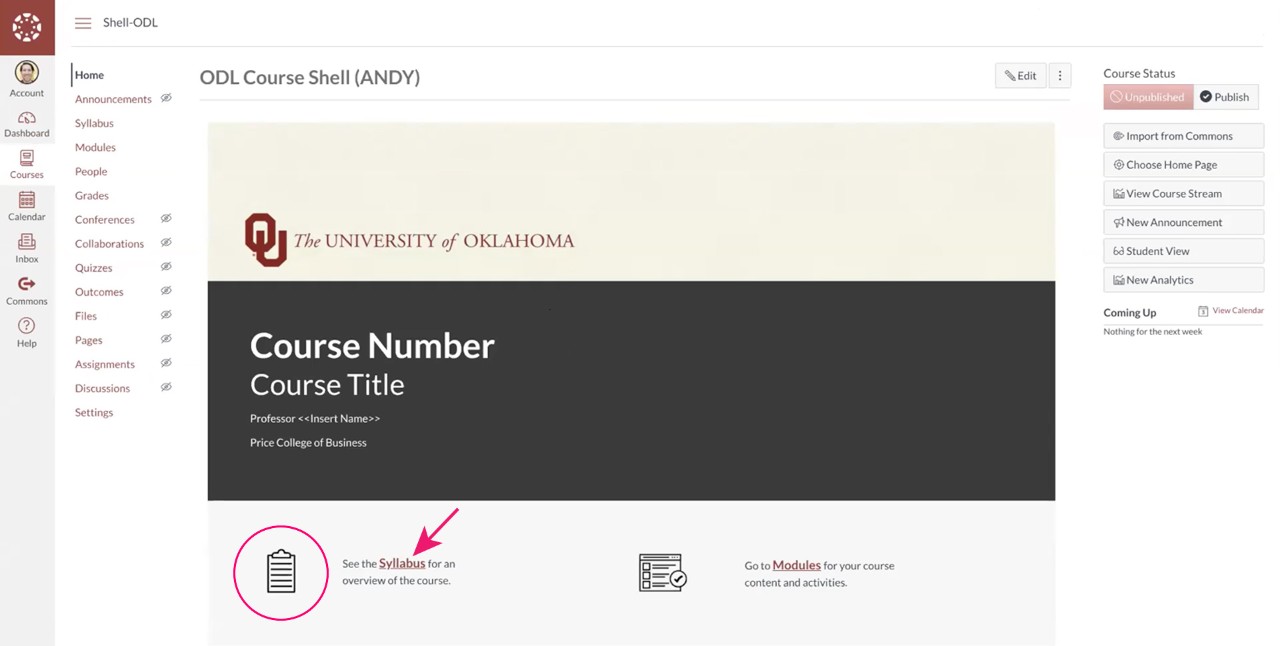
For another example, please see figure 2c below. Here we have an image at the top of the page. Below that we have the course number and course title, and underneath that we have some icons whrere a syllabus and course modules are linked. Having all of this information on your homepage will ground your students and really spell out which course they're in. They can't get lost in Canvas when the information is clear and organized.
3.) Set a Specific Page as Your Homepage
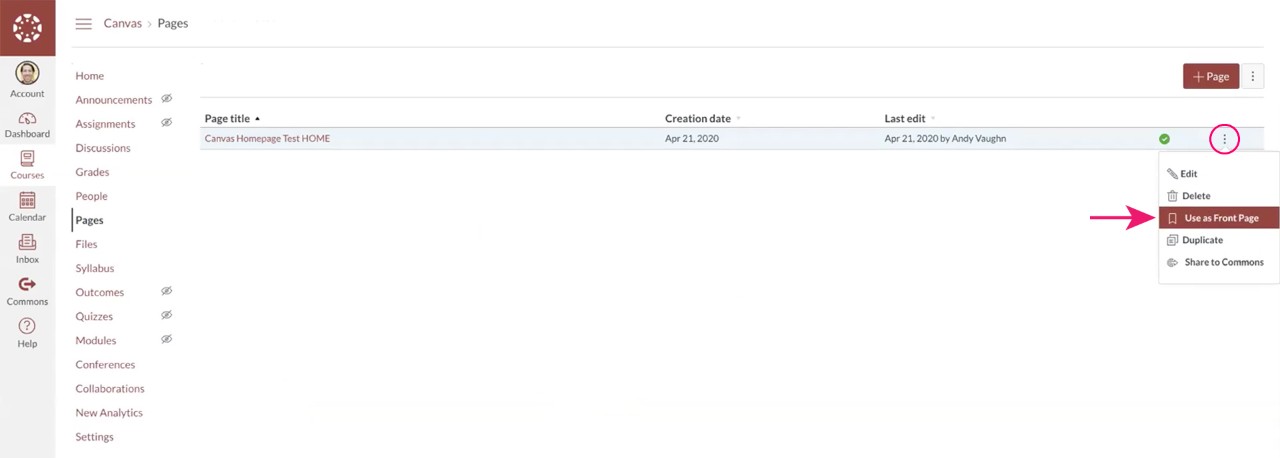
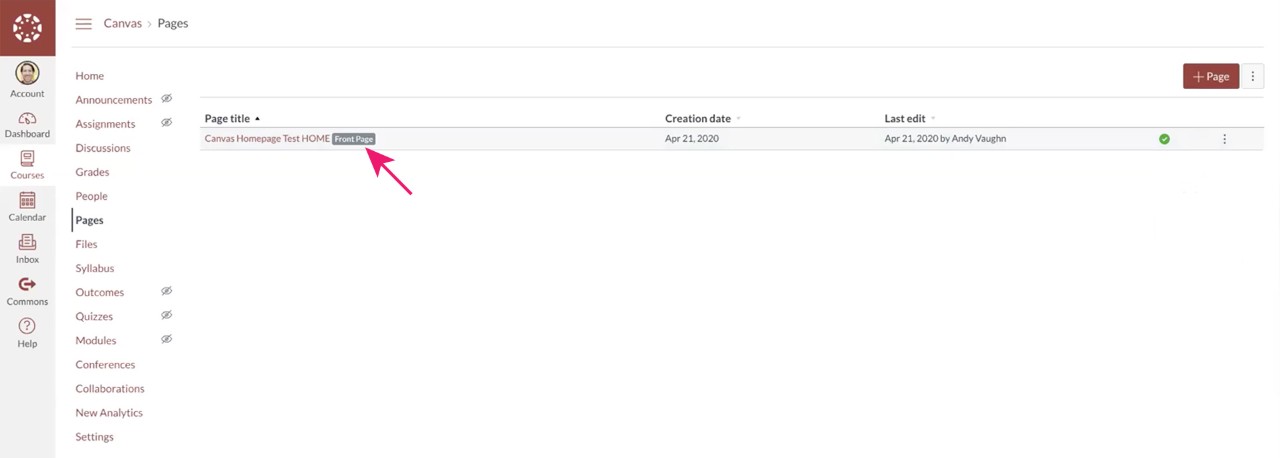
Earlier, you set your homepage as the Course Activity Stream. Now that you've built a new page to serve specifically as your course homepage, you can navigate back to Pages on your left-hand course navigation menu. Click on Pages and a list of your created pages will appear. Since you've only made the one so far, there will only be one on the list. Now, find the settings menu for your page in the upper right-hand corner. It looks like three vertically stacked dots. Click this and a drop-down menu will appear (figure 3a). Here you can select "Use as Front Page" which will queue the page you just created to be used as your new homepage. Once selected, an icon that says "Front Page" (figure 3b) will appear in your pages list next to the page you just set as the homepage.
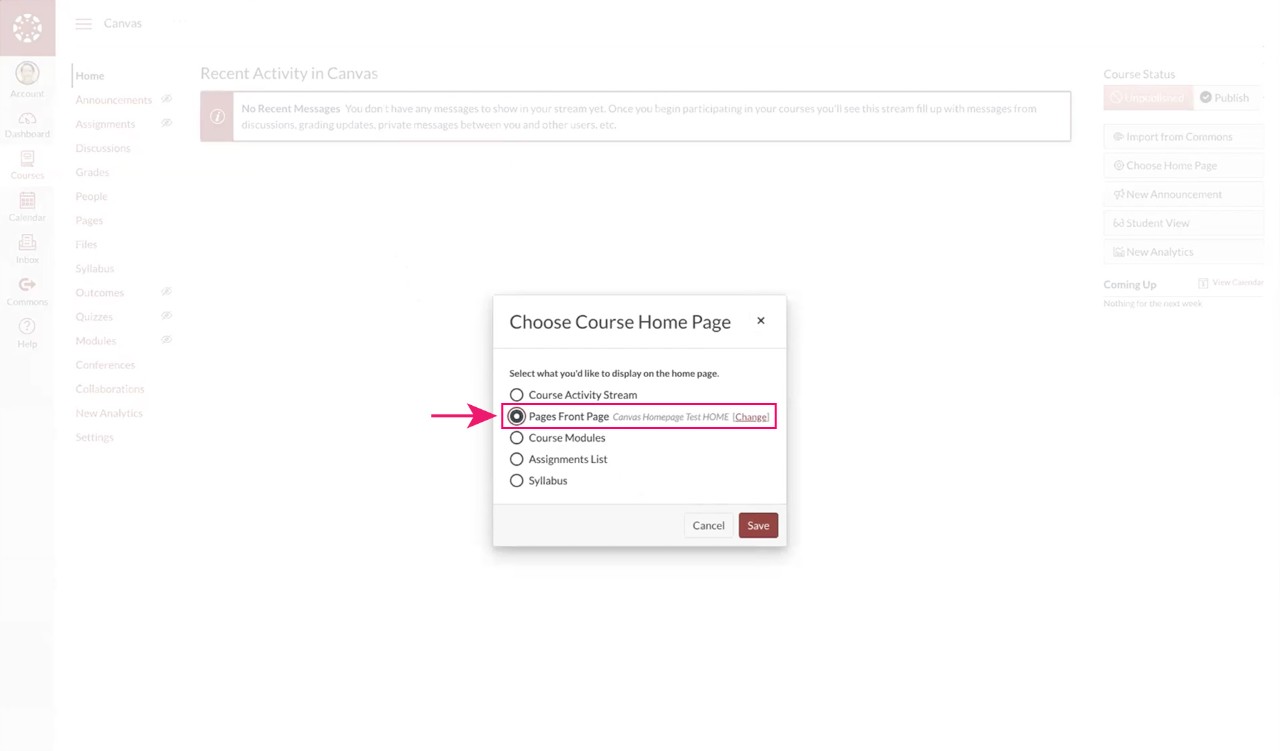
After this, navigate back to Home on your left-hand course navigation. Once there, you can complete the exercise that was started earlier when you chose to set your homepage. Click on Choose Home Page in the upper right-hand menu. Now when the pop-up appears it allows you to choose Pages Front Page (figure 3c). Select this option and save. And voila, you've designed and set a Canvas course homepage!
4.) Add a Course Image to Match Your Homepage
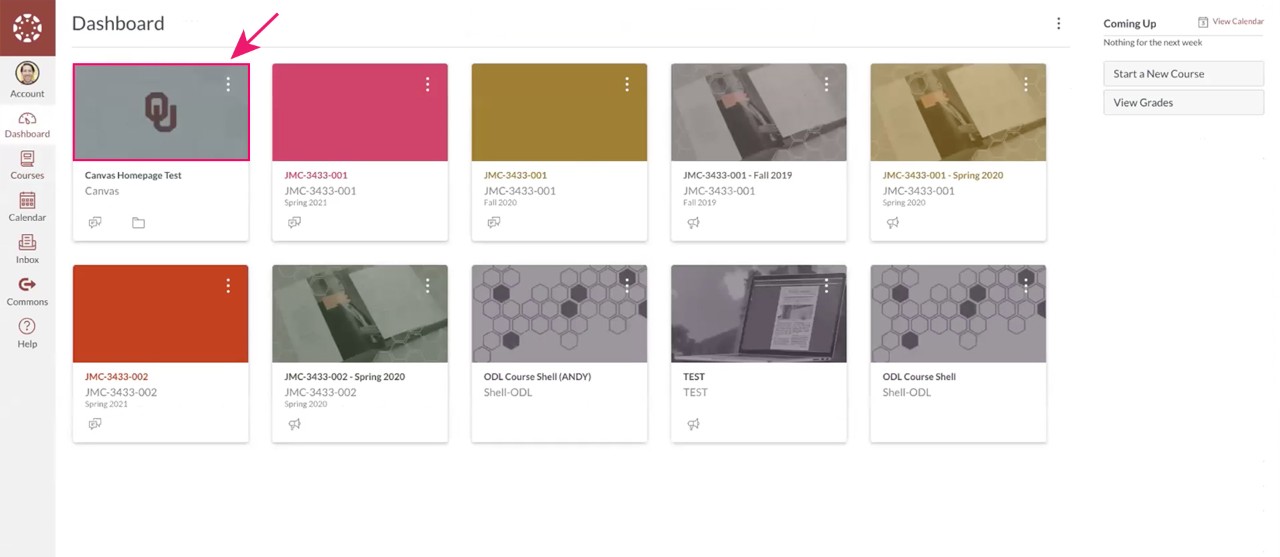
By now, you've successfully created a course homepage, but let's kick it up a notch by adding a "course image." This is an image that will appear on your Dashboard to represent your course. I recommend making it something very specific to your course, perhaps even matching the image that you made for your homepage, albeit on a smaller scale.
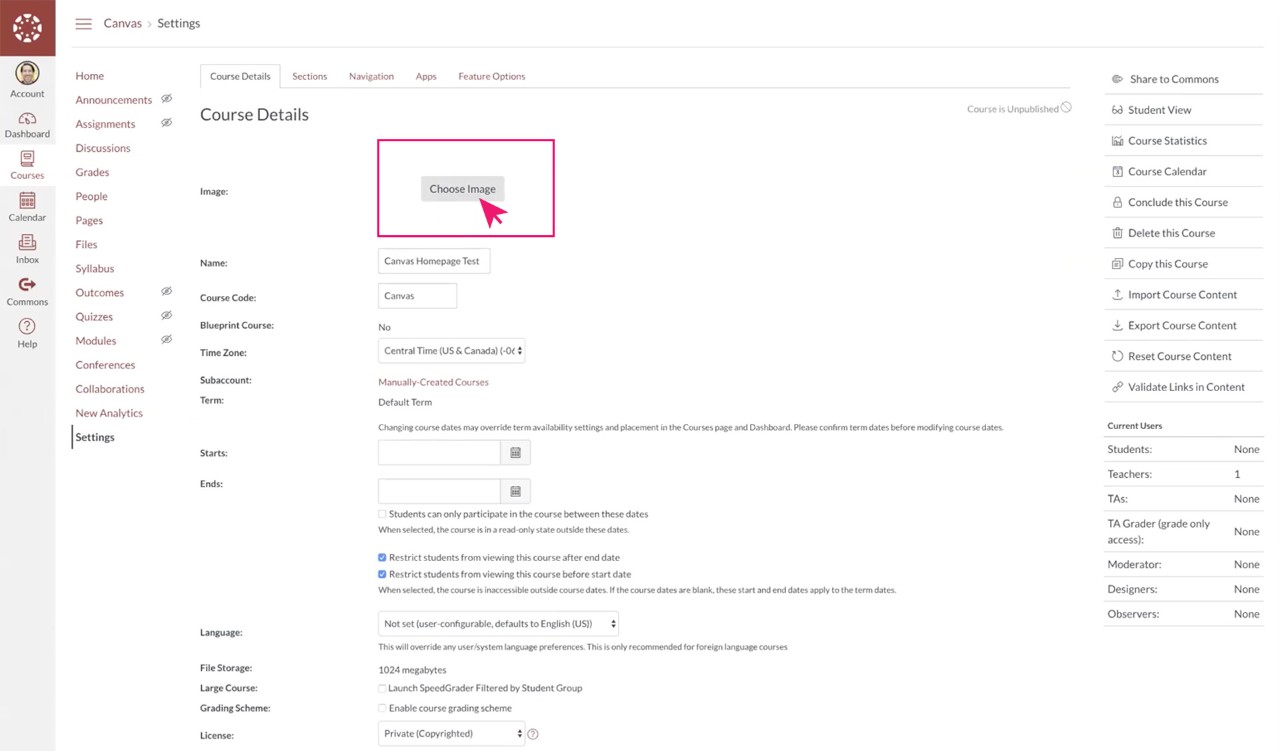
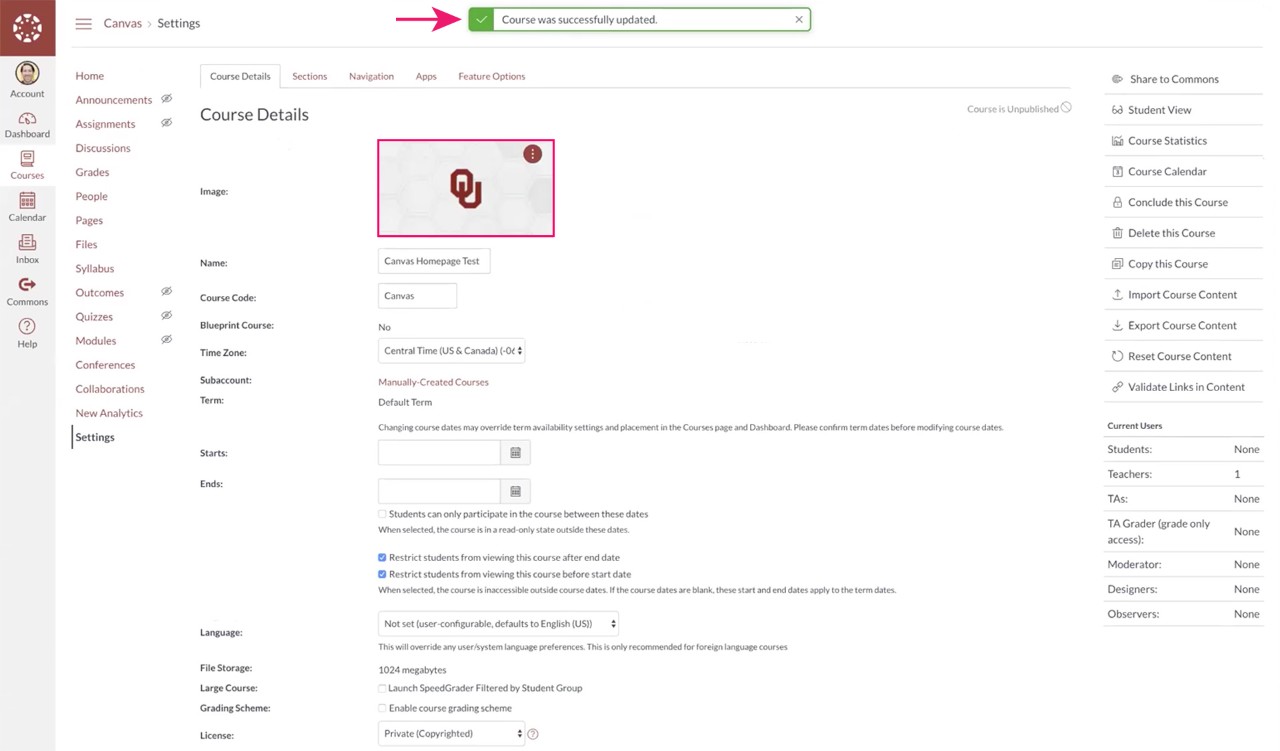
To add a course image, go to the left-hand course navigation menu and choose "Settings." Next, on the Course Details tab within Settings, click choose image (figure 4a), then upload image (figure 4b), and your chosen image will appear (figure 4c). Click save and then go back to your Dashboard. You should now see the image you've selected appear for said course on your Dashboard (figure 4d).
