Running Jobs on Sooner and Schooner
Table of Contents
- Job Scheduler - SLURM
- Documentation
- Translating to SLURM commands from other workload managers
- Basic SLURM Commands
- Environment Module System - LMOD
- Running Jobs on Sooner (EL9 Container)
- Sample Jobs
Job Scheduler - SLURM
Both Schooner and Sooner uses SLURM to manage jobs on the cluster. The Simple Linux Utility for Resource Management (SLURM) is an open-source, scalable cluster management and job scheduling system, and is used on about 60% of the largest compute clusters in the world.
Learning SLURM
Online: Official SLURM documentation
On Schooner or Sooner: Use the man command to learn more about the commands.
Example: Typing man sbatch will give you the manual page for the sbatch command
Got scripts for other workload managers?
If you have scripts written for other workload managers like PBS/Torque, LSF, etc., please refer to this conversion guide for the most common SLURM commands, environment variables, and job specification options.
Information on jobs (squeue)
The squeue command displays information about jobs running on Schooner or Sooner in the following format: Job ID, Partition, Name, User, Job State, Time, Nodes, Reason.
Typing squeue lists all current (and pending) jobs in the queue.
Typing squeue -u <username> lists all jobs in the queue for the specified user.
Typing squeue -u <username> -t PENDING lists all the pending jobs for the specified user.
Typing squeue -u <username> -t RUNNING lists all the running jobs for the specified user.
More information about the squeue command can be found on the SLURM online documentation or by typing man squeue on Schooner or Sooner.
Partition Information (sinfo)
The sinfo command provides information about the partitions (or queues) you have access to on Schooner or Sooner. The information is displayed in the following format: Partition Name, Availability, Time Limit, Nodes, State, Node List.
Typing sinfo provides information on all the queues you are assigned access to.
Typing sinfo -p <partition_name> provides information for the specified queue
More information about the sinfo command can be found on the SLURM online documentation or by typing man sinfo on Schooner or Sooner.
Debugging Jobs (scontrol)
The scontrol command can be used to get configuration details about a job, node, or partition, and is especially useful for debugging jobs.
Typing scontrol show job <job_number> gives details about the particular job.
Typing scontrol show partition <partition_name> provides configuration details (for example: priority, allowed accounts, allowed memory per node, etc.) for all available partitions.
More information about the scontrol command can be found on the SLURM online documentation or by typing man scontrol on Schooner or Sooner.
Submitting Batch Jobs (sbatch)
The sbatch command is used to submit jobs to SLURM. Within a job script, SBATCH directives can be used to specify resource parameters such as job name, output file, run time, etc. The Sample Jobs section below provides examples of common sbatch commands and SBATCH flags.
More information about the sbatch command can be found on the SLURM online documentation or by typing man sbatch on Schooner or Sooner.
Cancelling Jobs (scancel)
Use the scancel command to cancel pending and running jobs.
Typing scancel <job_number> cancels the specified job.
Typing scancel -u <username> cancels all jobs for the specified user.
Typing scancel -t PENDING -u <username> cancels all pending jobs for the specified user.
More information about the scancel command can be found on the SLURM online documentation or by typing man scancel on Schooner or Sooner.
Environment Module System - LMOD
Both Schooner and Sooner host a wide range of software, compilers and libraries to meet user needs. Often, multiple versions of the same software or compiler are installed. Lmod helps manage these installations through modules, allowing users to create a custom environment environment by loading only the modules they need.
LMOD modules are displayed in the following form: <application_name>/<application_version>-<compiler_type>
Example: NAMD/2.11-intel-2016a-mpi
Software that has not been compiled with a specific compiler will not include the <compiler type> in its module name. Example: MATLAB/2015a
Listing all available modules
Typing module avail lists all modules installed on Schooner or Sooner. Modules are displayed in the format: <application_name>/<application_version>-<compiler_type>.
You would see a list similar to this:
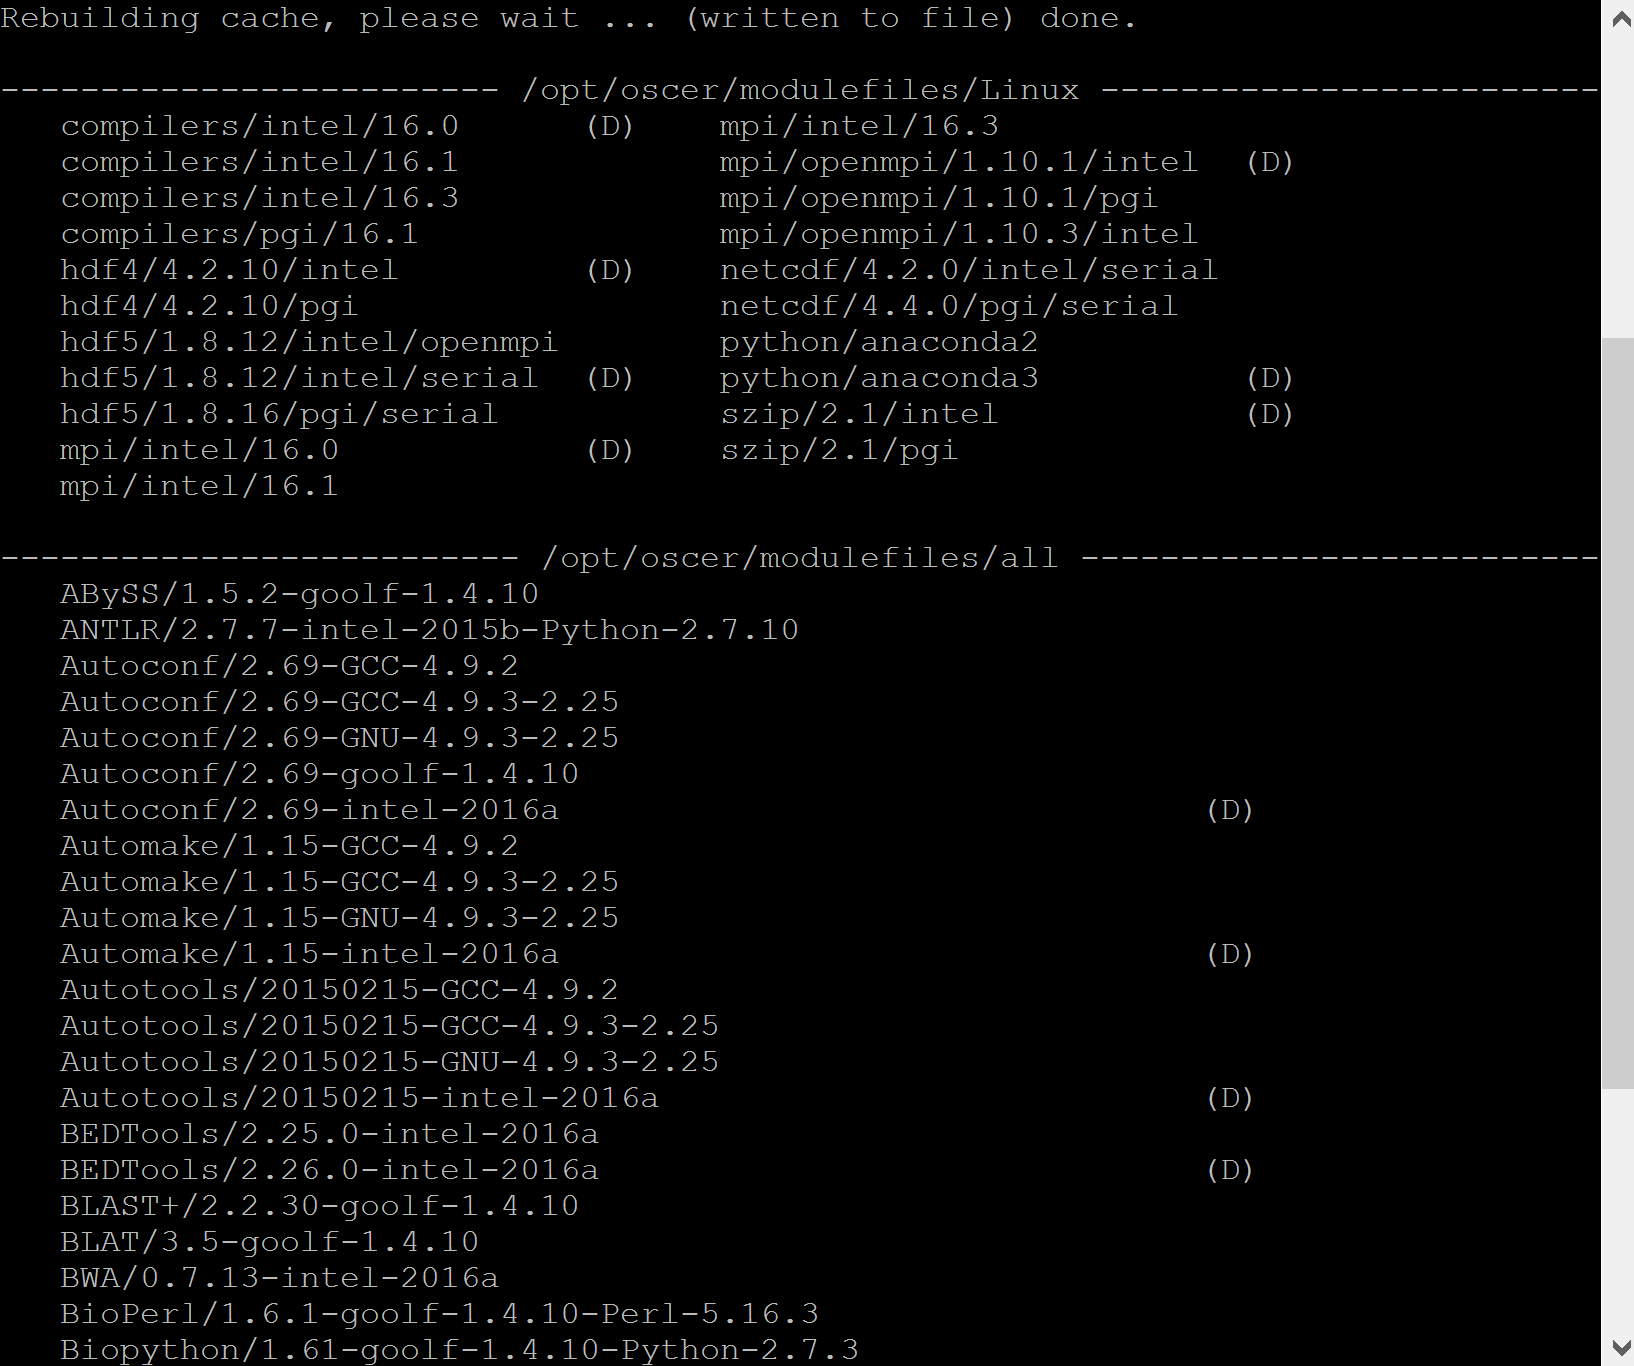
Default Modules
Some modules have a (D) next to them, which indicates have multiple versions are available. The (D) marks the default module, the version that will load automatically if you do not specify a version.
Example:
The following show the Autoconf modules on Schooner:
Autoconf/2.69-GCC-4.9.2
Autoconf/2.69-GCC-4.9.3-2.25
Autoconf/2.69-GNU-4.9.3-2.25
Autoconf/2.69-goolf-1.4.10
Autoconf/2.69-intel-2016a (D)
Loading a module
Typing module load <application_name> will load the default version of the module AND its dependencies.
Typing module load <application_name>/<application_version>-<compiler_type> will load that specific module AND its dependencies
Example:
The following versions of Autoconf are installed on Schooner:
Autoconf/2.69-GCC-4.9.2
Autoconf/2.69-GCC-4.9.3-2.25
Autoconf/2.69-GNU-4.9.3-2.25
Autoconf/2.69-goolf-1.4.10
Autoconf/2.69-intel-2016a (D)
Typing module load Autoconf will load Autoconf/2.69-intel-2016a by default
To load a specific version, for example Autoconf/ 2.69-GCC-4.9.2, type module load Autoconf/2.69-GCC-4.9.2
Listing all loaded modules in your environment
Typing module list displays all the modules currently loaded in your environment.
Removing modules from your environment
To remove specific modules, type module unload <application_name>
To remove ALL modules, type module purge
Running Jobs on Sooner
Sooner runs Enterprise Linux 9 (EL9) and Enterprise Linux 7 (EL7) using a containerized environment to maintain compatibility with software originally built on Schooner (EL7).
Before submitting jobs on Sooner, you need to enter the EL9 container by typing el9 or EL7 container with el7. Inside the container, you can load modules, build software, and configure your environment.
Once finished configuring your environment, exit the container before submitting your batch script by typing exit.
IMPORTANT: Your batch script must include following SLURM directives
#SBATCH --partition=<el9_partition>
#SBATCH --container=el9hw
#SBATCH --chdir=/path/to/working/directory
Sample Jobs
A typical job script has two main sections: requesting resources and specifying job steps. Requesting resources involves indicating the number of CPUs, memory, runtime, and other such requirements. This is done using #SBATCH directives within your script. Job steps define the actual tasks or commands that will be executed on the compute node.
Non-Parallel Job
The following example shows a simple non-parallel job for Schooner that uses the hostname command to display the name of the node where the job runs. You can create or edit this file with your preferred text editor. If you don’t have one, we recommend nano. You may name the submit script whatever you like, though we suggest using the .sbatch extension to distinguish it from other shell scripts. In this example, we’ll call it single-test.sbatch.
Note: Additional directives required for Sooner must be added to this script. See Running Jobs on Sooner for details.
#!/bin/bash
#
#SBATCH --partition=normal
#SBATCH --ntasks=1
#SBATCH --mem=1024
#SBATCH --output=jobname_%J_stdout.txt
#SBATCH --error=jobname_%J_stderr.txt
#SBATCH --time=12:00:00
#SBATCH --job-name=jobname
#SBATCH --mail-user=youremailaddress@yourinstitution.edu
#SBATCH --mail-type=ALL
#SBATCH --chdir=/home/$USER/working_directory
#
#################################################
hostname
After you have saved this file -- here called single-test.sbatch -- you will need to make it executable with the command
chmod +x single-test.sbatch
And then you can submit your job with
sbatch single-test.sbatch
Code Walkthrough
The SBATCH directive below says the name of the partition to be used. In most cases, you should use the queue named normal.
#SBATCH --partition=normal
The SBATCH directive below says to use 1 CPU core of 1 CPU chip on 1 compute node, meaning that this batch jobs is non-parallel (serial).
#SBATCH --ntasks=1
The SBATCH directive below indicates to the scheduler the amount of memory your job will use in megabytes. This is critical information for scheduling of nonexclusive jobs, since it prevents the scheduler from assigning more jobs to a given compute node than that node has memory for.
#SBATCH --mem=1024
The default unit is MB, but you can also specify GB, for example --mem=8G
The SBATCH directives below tells SLURM to send ouput and error messages to the filenames
listed below. Note that, in these filenames, %J will be replaced by the batch job ID number.
#SBATCH --output=jobname_%J_stdout.txt
#SBATCH --error=jobname_%J_stderr.txt
The SBATCH directive below says to run for up to 12 hours (and zero minutes and zero seconds)
#SBATCH --time=12:00:00
The maximum time limit for most partitions is 48h, which can be specified as 48:00:00 or 2-00:00:00
The SBATCH directive below says the name of the batch job. This name will appear in the batch partition when you do an squeue command. You can rename jobname to any name you like.
#SBATCH --job-name=jobname
The SBATCH directive below says the e-mail address to send notifications to, which should be changed to your e-mail address.
#SBATCH --mail-user=youremailaddress@yourinstitution.edu
The SBATCH directive below says to e-mail a notification when the batch job either completes or fails. If you do not include this SBATCH directive, you will only get an e-mail if the batch job fails.
#SBATCH --mail-type=ALL
Change to the directory that you want to run in.
#SBATCH --chdir=/home/$USER/working_directory
This directory needs to exist before the job is submitted.
This command gets the name of the compute node that runs the job. This is just a very simple example. You would put your actual executable there, or your job loop, or whatever payload you need to run.
hostname
Parallel Job
The following code is a simple parallel job that runs on 40 MPI processes at 20 MPI processes per node.
Download the sample code from Wikipedia and save it as mpi_example.c in your working directory
Compile it using the following commands:
module load OpenMPI
mpicc mpi_example.c -o hello.mpi
Now run the following code (see the non-parallel job example above for more information about batch script naming and submission):
#!/bin/bash
#SBATCH --partition=normal
#SBATCH --exclusive
#SBATCH --nodes=2
#SBATCH --ntasks=40
#SBATCH --ntasks-per-node=20
#SBATCH --output=jobname_%J_stdout.txt
#SBATCH --error=jobname_%J_stderr.txt
#SBATCH --time=10:00
#SBATCH --job-name=jobname
#SBATCH --mail-user=youremailaddress@yourinstitution.edu
#SBATCH --mail-type=ALL
#SBATCH --chdir=/home/$USER/working_directory
module load OpenMPI
mpirun hello.mpi
Code Walkthrough
The SBATCH directive below says the name of the partition to be used. In most cases, you should use the queue named normal.
#SBATCH --partition=normal
The SBATCH directive below says to request exclusive access on the participating compute nodes, so that other batch jobs (for example, those submitted by other users) don't run on the same compute nodes as this batch job, and therefore don't interfere with it.
#SBATCH --exclusive
Use 40 MPI processes at 20 MPI processes per node, which is to say 2 nodes in the case of the normal partition.
Please use the following pattern for nodes in the normal partition:
For ntasks <= 20, please use ntasks-per-node equal to n unless you have a very good reason to do otherwise.
For ntasks >= 20, please use ntasks-per-node equal to 20 unless you have a very good reason to do otherwise.
This is because each compute node has 2 chips and each chip has 10 cores, for a total of 20 cores per node. We recommend using the same number of MPI processes per node as cores, unless you've benchmarked your code's performance and found that you take fewer node hours by using fewer than 20 per node.
#SBATCH --nodes=2
#SBATCH --ntasks=40
#SBATCH --ntasks-per-node=20
The SBATCH directives below tells SLURM to send ouput and error messages to the filenames
listed below. Note that, in these filenames, %J will be replaced by the batch job ID number.
#SBATCH --output=jobname_%J_stdout.txt
#SBATCH --error=jobname_%J_stderr.txt
The SBATCH directive below says to run for up to 10 minutes
#SBATCH --time=10:00
The SBATCH directive below says the name of the batch job. This name will appear in the batch partition when you do an squeue command. You can rename jobname to any name you like.
#SBATCH --job-name=jobname
The SBATCH directive below says the e-mail address to send notifications to, which should be changed to your e-mail address.
#SBATCH --mail-user=youremailaddress@yourinstitution.edu
The SBATCH directive below says to e-mail a notification when the batch job either completes or fails. If you do not include this SBATCH directive, you will only get an e-mail if the batch job fails.
#SBATCH --mail-type=ALL
Change to the directory that you want to run in.
#SBATCH --chdir=/home/$USER/working_directory
This command loads the modules needed to execute the program. In this case, we are using OpenMPI.
module load OpenMPI
This command executes the hello.mpi file we compiled earlier
mpirun hello.mpi
Upon successfully completing your job, your output file should look like this:
We have 40 processes.
Process 1 reporting for duty.
Process 2 reporting for duty.
Process 3 reporting for duty.
Process 4 reporting for duty.
Process 5 reporting for duty.
Process 6 reporting for duty.
Process 7 reporting for duty.
Process 8 reporting for duty.
Process 9 reporting for duty.
Process 10 reporting for duty.
Process 11 reporting for duty.
Process 12 reporting for duty.
Process 13 reporting for duty.
Process 14 reporting for duty.
Process 15 reporting for duty.
Process 16 reporting for duty.
Process 17 reporting for duty.
Process 18 reporting for duty.
Process 19 reporting for duty.
Process 20 reporting for duty.
Process 21 reporting for duty.
Process 22 reporting for duty.
Process 23 reporting for duty.
Process 24 reporting for duty.
Process 25 reporting for duty.
Process 26 reporting for duty.
Process 27 reporting for duty.
Process 28 reporting for duty.
Process 29 reporting for duty.
Process 30 reporting for duty.
Process 31 reporting for duty.
Process 32 reporting for duty.
Process 33 reporting for duty.
Process 34 reporting for duty.
Process 35 reporting for duty.
Process 36 reporting for duty.
Process 37 reporting for duty.
Process 38 reporting for duty.
Process 39 reporting for duty.