Fostering Student Interactions
Without social interaction, our students lose both the cognitive benefits of sharing ideas with the peers as well as the socio-emotional benefits of being in a learning community. Reflecting on my own experience as a student (and even now), some of my most memorable moments of insight came from vicarious learning opportunities (or learning through observation, rather than direct, hands-on, instruction). Watching how my classmates asked analytical questions, seeing a draft of a friends’ research paper, or taking notes as a group all helped me understand concepts and skills in ways I never could have on my own. But how can students engage with you, with each other, and with the material when we don’t actually meet face to face? This post will provide a brief introduction to a variety of tools and strategies that can help you foster student interaction in an online environment. While there are tools (e.g. Zoom) that can allow you to meet and talk live, here are a few asynchronous, low-bandwidth suggestions.
To organize the information, I broke these techniques down using three categories: Discussions, Collaborative Assignments, and Public Work. For each of these categories I will introduce three tools as well as three ways to use them to foster student engagement. Discussions focuses on tools that can help students enter into conversations as they work understand and think through the course material. Collaborative Assignments introduces tools that allow students to work together to complete a task or project. And Public Work outlines ways to help students interact over their creations and highlights the benefits of public writing as a space for student engagement.

Main Takeaways
Before explaining these strategies, here are a few key points to keep in mind when using digital tools to foster student interaction.
- It doesn’t have to be Zoom (or live video conferencing)! There are benefits to holding live video sessions, but there are drawbacks as well. If you're concerned about Zoom or other synchronous tools because of privacy, “zoombombing”, students' access to technology, technology failure, or the inflexible schedule, there are many ways to create quality interactions asynchronously. Oftentimes collaborative or interactive assignments can go even better in an asynchronous environment where students have the time to think through their replies and responses, as many students find it difficult to speak up in a large Zoom meeting.
- Build the interaction into the assignment with specific quality and quantity instructions. If your goal is to foster a discursive connection between students, then you’ll want to build it into your assignments. Be specific with the quantity (e.g. three annotations + 2 replies) and the quality (e.g. at least 250 words and two quotes/ciations from the text). Consider spending time during the first week modeling a quality post or analytical discussion question. You can evaluate a few examples with your students to discuss (or decide together!) what “quality” looks like in your course. You can use a rubric or include initial quiz to clarify your expectations.
- Let the Goals be your Guide. Instead of picking a tool and trying to use it or design an assignment around it, let your learning goals for your students (and their learning goals for themselves) be your guide. There are so many of wonderful tools out there that make online learning promote even more interaction than you might have had in a face-to-face class. But what I don’t want to happen is for you to see all these tools and think you have to use all (or even more than one or two) of them. That would be way too much for you and for your students.
If you’re getting nervous about the prospect of using digital tools and you’ve started googling around and finding a whole world of online pedagogy and neat tools and you’re getting nervous, take a beat. You don’t have to use a bunch of new tools—you can keep it simple.
Discussions
How can we make discussions more engaging, more organized, more equitable, and more academically challenging? Let’s face it, in live classes “let’s discuss” often results in the instructor doing most of the talking. You might throw out a couple of questions like “So what did you think about it?” and a few students will respond, resulting in something that looked like a discussion. But ultimately it was just a conversation between the professor and a handful of extroverted and motivated students. Digital tools have actually helped me correct a lot of this and has made my crucial formative assignments so much richer. It’s made me plan ahead and craft better prompts, it’s made the quiet ones speak and the talkers listen.
Here are three tools, along with three strategies per tool, that can help create robust discussions online.
The discussion board that is built into Canvas (or any LMS) is not the fanciest tool, but when used thoughtfully it can still be an easy space for starting student interactions. It is reliable, accessible, and familiar. Here are three strategies for using the discussion board efficiently:
- The Post-Respond-Rejoinder: Students publish an original question or post by Wednesday, respond to two other classmates by Friday, and provide a rejoinder to at least one person who commented on their original post by Sunday. You can also organize it by groups, with Group A posting by Wednesday, Group B responding by Friday. Either way, this strategy can get a true back-and-forth conversation going. Don’t forget to specify quality expectations!
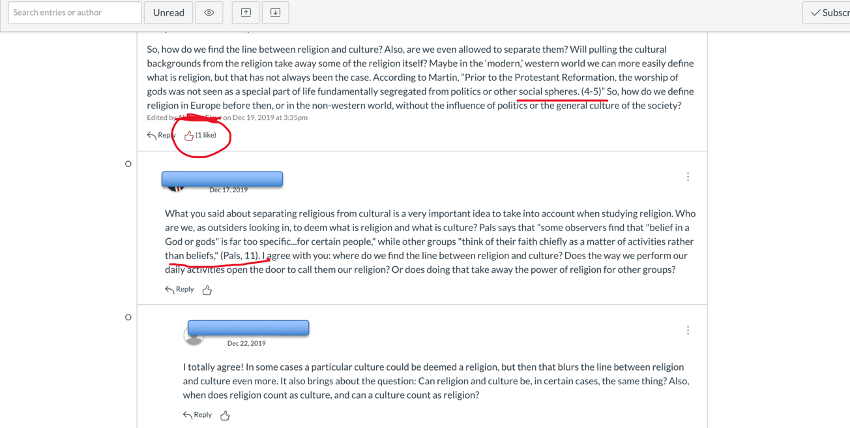
- The Vote Up: Students can use the “like” feature to vote for their favorite post. You can use this strategy, for example, to structure a live session via Zoom. Before the session, Group A posts questions/issues that they would like the instructor to address during the meeting, and Group B “likes” their top three questions/issues raised by Group A. The instructor will then address the questions with the most likes. (see fig. A below)
- The Discussion Summary: Each week a different student in a small group can take turns being the “discussion monitor” wherein they summarize the group’s discussion. This could be extended into the Live Session, where the monitor would present a quick summary of their group’s discussion to the full class. This is helpful if synthesizing information is one of your goals for your students.

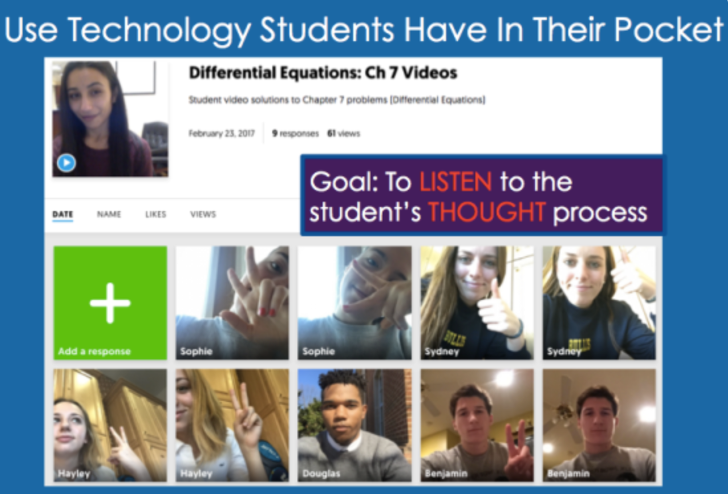
Flipgrid is a video discussion platform, but you can easily add the Flipgrid app to your Canvas course for a seamless integration (your students don’t need to log in to another tool, and it shows up in speed grader just like any other assignment). Instructors can post topics to spark the conversation and students respond with short videos. It’s mobile friendly, so if students only have a mobile device this would still be very accessible. Instructors and students can respond to each other with text or in another short video. You can choose one or two standout videos to add to a “mixed tape” each week, so by the end of the course you could have a little video compilation of all the main ideas and points from your course, as told by your students! This tool is great for students who wouldn’t normally speak live, and it’s a fun way to create community and get to know people better.
Here are three strategies for using Flipgrid:
- The Introduction: Spice up your introductory discussion board by doing it as a Flipgrid! This way students actually get to see each other and get a sense of their classmates’ personalities at the beginning of the course.
- The TQE: Students highlight one Thought, Question, and Epiphany from a particular unit or course material. It is a challenge to keep these short (you can set various time limits—I like to keep mine at 2 minutes or less). Students can get creative with how they present their TQEs, and these are perfect to add to the class “mixed tape.”
- The Teach, OK!: Students have to “teach” a concept, process, or topic in only a minute and a half. You could have everyone do this or split the class into halves or groups have them each teach a different concept to each other. The class can “like” the videos they found most effective and those can be added to the mixed tape.

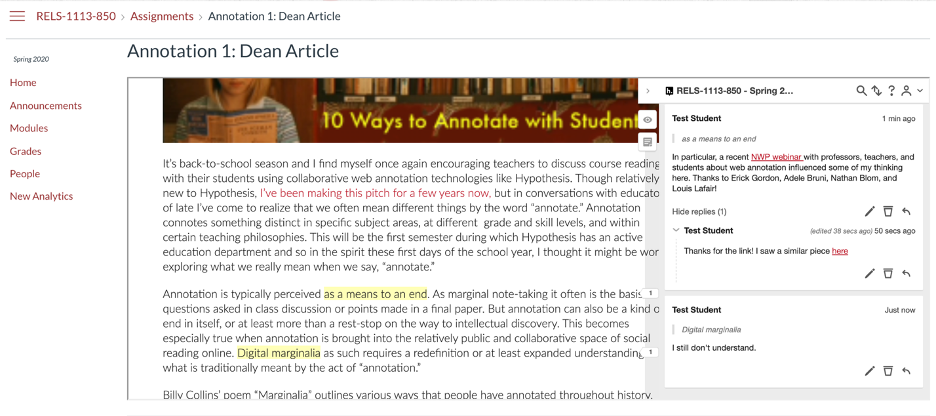
Hypothes.is is a web annotation tool that lets you make notes in the margins of a website or PDF. You can post text, links, and images right there on the text (you can also include math typesetting by enclosing supported LaTeX commands). This tool has so much potential for holding discussions, reading socially, organizing research, and taking personal notes. Like Flipgrid, the app can be easily added to Canvas for seamless integration. As the folks at Hypothes.is put it, this makes reading visible active, and social, providing endless possibilities for collaboration and interaction. Here are three:
- The Post/Reply: Students post a certain number of comments and replies. This method also allows students to learn from each other’s (and your, if you are participating) comments, modeling those critical thinking skills that are often so hard to articulate. Seeing how other people ask analytical questions, or how they are comparing/contrasting texts can help students improve their own analysis. You could make the posts more specific by having them annotate as question, opinion, rhetorical analysis. (see fig. B below)
- The Gloss: Students can create a list of vocabulary words from a text, explain allusions in literature, or present a text annotated like a scholarly volume. You can use this in subjects from literature to scientific research papers.
- The Public-but-Independent Research: Students can engage in their own research of a chosen topic but continue to share their annotations with a group or the public. As the instructor, you can aggregate individual inquiries by using a class tag, or require students to provide peer-feedback as they generate and develop their research question. Basically, it can serve as an annotated bibliography on steroids. You can see what they’re thinking, and they can see what other people are doing and how they are using certain sources in their research, which can be a huge opportunity for that vicarious learning to take place. It can be very helpful requiring student annotations as a research/pre-writing tool. Providing this space to get peer and instructor feedback at an early research stage has proven more useful than reviewing a product that has already been drafted.

Collaborative Assignments
We know the benefits of group work: in addition to the social benefits of building community, collaborative assignments teach skills like time management, planning, and communication. and manage time. Students can challenge each other’s assumptions and help each other refine understanding through discussion and explanation. But how can students interact over group assignments when they can’t meet face to face? Here are some digital tools allow students to collaborate from a distance.
These tools allow you to instantly share messages and files and hop on voice calls or video calls. Few platforms for education provide a social, community-based space, complete with a full mobile solution. In other words, it provides an unstructured space for dialogue without assessment, objectives or expectations. You and your students already have access to Teams with your NetID and Password, so set-up would be a breeze (Slack has a free version and easy set-up as well). It’s much easier to organize/keep track of messages than email, plus it can be synchronous (or allow for a quick, real-time conversation). You can set up channels dedicated to specific purposes (reading-questions or problem-sets), your students can collaborate on projects or engage in synchronous note taking during a lecture.
Both suites of tools offer the same basic core applications on which students can collaborate. Each has word processing, spreadsheet, and presentation tools, and each has cloud storage associated with it. Using the Collaborations tab in Canvas, you can help you students organize work on tasks like group papers or note-taking. This page gives them (and you) an easy place to keep track of those collaborations, and also to set them up without having to swap emails.
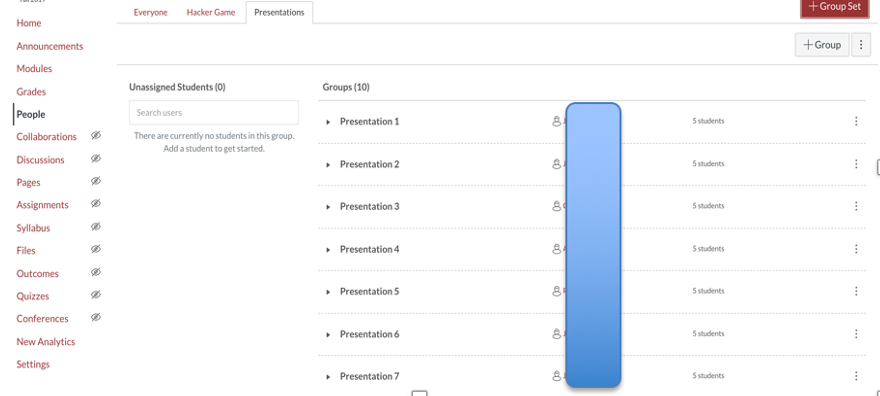
“Student groups” in Canvas are a useful way to organize students for things like group projects or papers. Every student group gets their own calendar, discussion board and collaboration tools so they can organize themselves and work together more effectively. You can randomly assign students to groups of a specific size, or manually create and organize the groups. Once your groups are created, you can set assignments to be "group submission" assignments, which means each group will have one submission for all users of that group. To access this tool, choose People in Canvas and create a Group Set (i.e., the title of the assignment), then you can add Groups (manually or automatically).

Public Work
Even if the assignment is individual rather than group, students can still interact over their creations. Digital tools allow us to go beyond the student-to-teacher assignment to help students create work that can be shared with friends, family, and even future employers. Public work has several benefits: students are writing or producing for a genuine audience (not just you). They have a product they can take with them beyond the classroom or to add to their CV/Resume. Finally, our ideas become clearer and more valuable when we share them and receive feedback from others. But how can your students share this work digitally? Through OU Create, all OU students, faculty, and staff can register a web domain (.com, .org, .net) or subdomain and create blogs, portfolios, and wikis. Users can easily design their websites using applications such as WordPress and Omeka. Your website could host the following types of projects:
If you want student writing to be public and/or easily shareable with the rest of the class, you can have them create a personal blog where they publish their essays or assignments. Everyone could have their own blog, and you can aggerate those blogs on single site. Alternatively, you could set up a class blog that you host (like an editor) and students contribute and post feedback (that is, everybody contributing it to the same blog). You can also showcase student work in your department by publishing select essays on a department blog.
If students are producing more than text (images, photographs, designs, etc), have then set up a portfolio showcasing their work. Students can share and provide feedback on each other’s work by simply sharing a link.
Remember, regardless of which tools you choose, make your expectations clear and let the learning goals be your guide!

