
| Invisible Buttons | Animation |
Invisible Buttons
Invisible buttons are buttons that are triggered not by selecting a button icon, but by selecting a pre-defined area of the screen. This area can be a clip art graphic, a piece of text or just part of the background. They allow you to hide buttons or associate actions with large graphics or text.
Choose "New Card" from the "Edit" menu. This creates card 4. Choose a texture from the "Colors" menu, similar to the example below.

Select the paint can tool and click on the card. This paints your background with the chosen texture.
Choose "Add Clip Art" from the "File" menu. Scroll down and select the file "Canada". (In HyperStudio 4 you will find this picture in the Maps directory within the HyperStudio Media Library directory. If you can't find the picture on your computer, you can obtain it from our Sample Files which you should have downloaded earlier). The clip art dialogue box appears. Using the lasso tool, draw a line around the outside of Canada. This will let you select just the Canada graphic and not the blue background. Click OK.
The graphic of Canada will now be on card 4 and shimmering. From the "Edit" menu, hold your mouse over "Effects" and when the sub-menu appears select "Scale." The scale dialogue box appears. Type "75" into the percentage box and click OK.
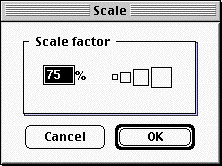
The graphic of Canada is now 75% of its original size. Drag the graphic to the center of the card and click outside of it to fix the position.
Double click on the text tool and set the font to the following settings:
Font - Times New Roman
Size - 18
Style - bold
Color - dark blue
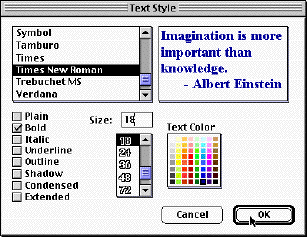
Click OK. Choose the text tool from the tools menu and place the following text above the map of Canada centered on the card:
"Please Click on Alberta."
Your card should look something like this:

Choose "Add a Button" from the "Objects" menu. This brings up the button dialogue. Name your button "Alberta" and select the invisible free form button type. See figure below. The invisible free form is the button type with the little lasso in its icon.
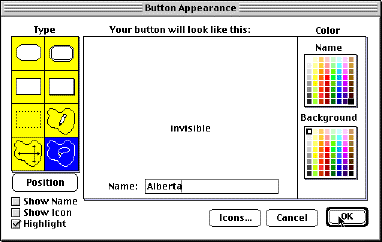
Click OK twice. You will now have to choose the area to be associated with your button. Draw a line around the province of Alberta with the lasso tool provided. When you release the mouse button, you will be prompted to see if you are satisfied with your button. If you are satisfied with your button, click OK, if not click "Try again" and redo it.
Now that your button shape is defined, you need to add an action to it. The actions dialogue should be on your screen. Choose "Add a sound." The tape recorder appears. As you did in the last tutorial, record yourself speaking the following text:
I go to the University of Alberta in Edmonton, Alberta.
Click the play button to hear your recording. If you are satisfied
with it, name it "Alberta" and click OK twice. If you are not satisfied,
re-record it until you are. Choose the browser tool and try your invisible
button. Add next and previous navigation buttons and give them sounds.
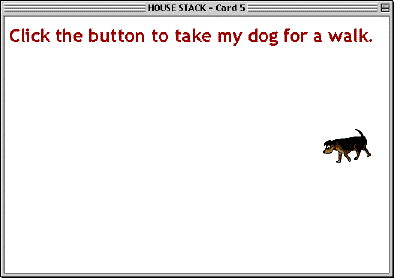
Add a new card with a simple colored background. These are things that you already know how to do. Choose "Add Clip Art" from the "File" menu. Select the file "Addy" and press OK. (In HyperStudio 4 the picture in our example is not supplied in the HyperStudio Media Library directory - use Addy.pct which was included with the Sample Files which you should have downloaded earlier). A screen with a bunch of dogs appears. Using the lasso, choose the walking dog with its head down and to the left.
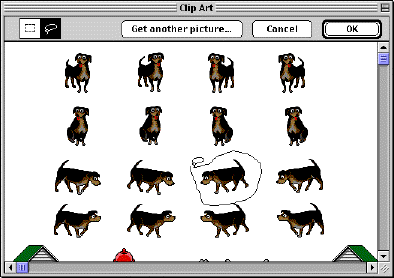
Position your dog on the right hand side of the card. Click outside of the dog graphic to fix its position.
Now we're going to add some text. Using the text tool, place the following text at the top of the card; choose a font, color and style that you like:
"Click the button to take my dog for a walk."
Your screen should look something like this:
Choose "Add a Button" from the "objects" menu. Name your button "Walk Dog" and choose a button appearance you like. Click OK and position your button in the bottom center of the card. When the actions dialogue appears, select "Play a sound." Choose the "Small dog" sound from the disk library. Click OK but do not click "Done" at the button actions window.
Next we're going to create an animation of the dog moving across the screen. The "small dog" sound will play at the same time as the animation. Select "Play Animation" from the "Things to do" choices. Some instructions appear; read them and then Click OK. You will now choose what will be the source graphic for your animation. Select the lasso tool and click "Current Card."
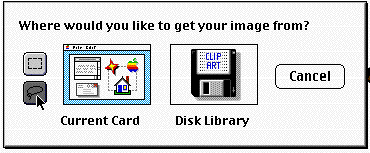
You will be looking at your card and the cursor will be shaped like the lasso tool. Drag around the picture of the dog. When you release your mouse button, a small dialogue box will appear below the card. This instructs you to set the path of the animation. To set your animation, move the image to where you want to start, click and hold your button down and drag along the path that you want the animation to follow. Release the mouse when you have reached the end. Remember that the animation is timed, so pauses in your mousing will result in pauses in your animation.
The animation window appears. Check "Show First Frame" and un-check "Erase When Done." Select "Try it" to see what your animation looks like.
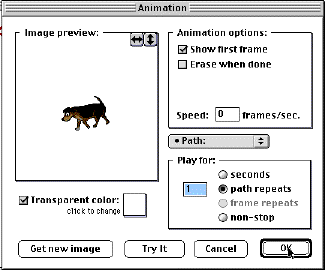
You can change it if you like. If you are not satisfied with your animation, select "New Path" from the pop up menu that has "Path" showing. Click OK and set your new path.
When you are satisfied with your path, click OK and then click "Done." Now you have to erase the original dog image. Select the eraser tool and erase the dog picture. Select the "Browser" tool from "Tools" menu and try out your new button. Your animation should play to the accompaniment of a small dog barking.
Let's finish up this card. Add a previous button with a sound. Place it in the bottom left hand corner. You already know how to do this. Now we're going to add a button that takes you back to the first card. Choose "Add a button" from the objects Menu. Choose the invisible button type that is a broken rectangle. Click "Icons." Choose the icon that looks like a little house. Click OK.
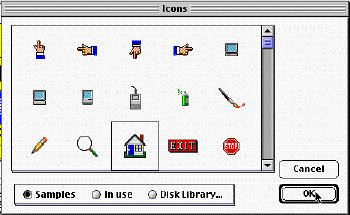
Position your icon so that it is not in the path of the animation. Click outside of the button to fix its position.
Choose "Another Card" from the "Places to go" choices. A dialogue will appear that allows you to choose which card you want to go to.
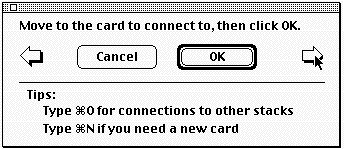
Click on the right arrow until you arrive at your first card. If you've followed the instructions exactly, you should only have to click once. When you see your first card, click OK. The transitions window appears. Choose a transition that you like and click OK. Add a sound to this button. You already know how to do this. Click Done. Choose the browser tool and try out your new button.
YOU ARE FINISHED!!
You have created a five card stack that has graphical (still and animated),
textual and sound elements. You have developed the basic skills necessary for
using HyperStudio to create multimedia presentations that use the most common
elements of hypermedia.
2.15.02 - LRW