
To log in to the CMS:
Use Google Chrome for the best experience.
Go to cmsauthor.ou.edu
Log in with your OU 4+4 and password
We recommend using the Google Chrome browser. While other browsers may work for some tasks, Chrome is the most compatible and reliable when working in the CMS.
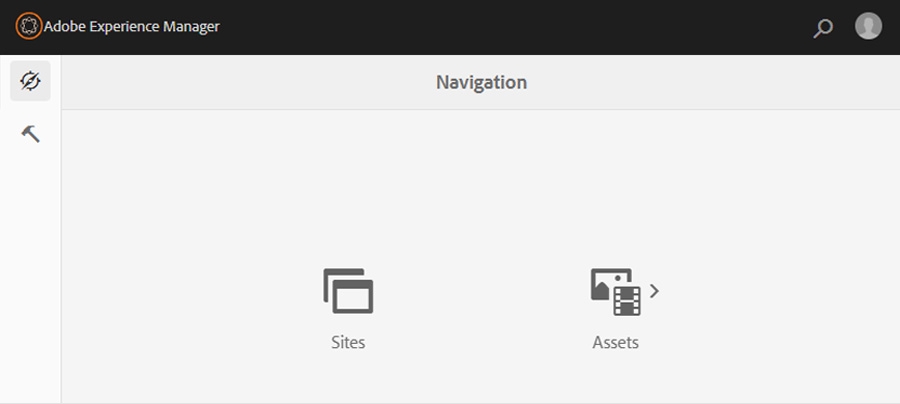
Once you log into the system, you’ll land on the main navigation—this is your home base and the starting point for all your work.
You’ll see two main options:
Both sections look and function similarly, so once you're comfortable navigating one, the other will feel familiar.
Tip: If you get lost while working in the CMS, click the Adobe Experience Manager icon in the upper left corner. It will always take you back to the main navigation screen.
The CMS uses a single-click system. This means you only need to click once to take action. No double-clicking needed. This applies in both the Sites and Assets areas.
Here’s how it works:
Clicking on a folder or page name will allow you to navigate through the folder structure of your site and create new pages. Items with sub-pages or will be indicated by a > icon
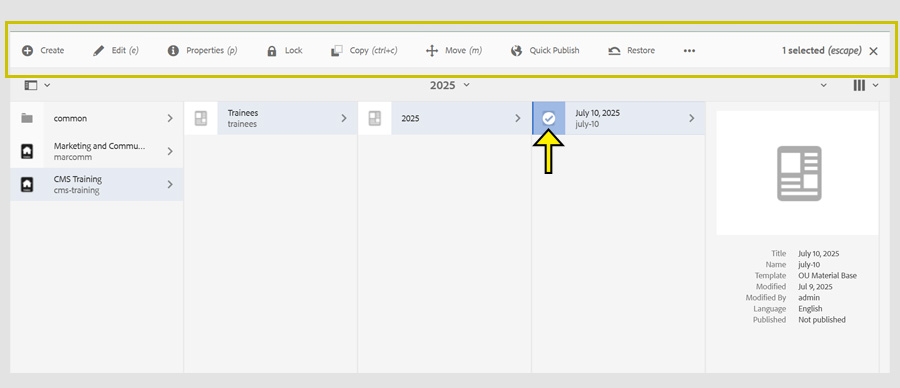
Clicking the square icon to the left of a folder or page title will place a check mark next to it. Once selected, a menu appears at the top of the screen with options such as Edit, Move, or Create. To close the menu, click the X icon.
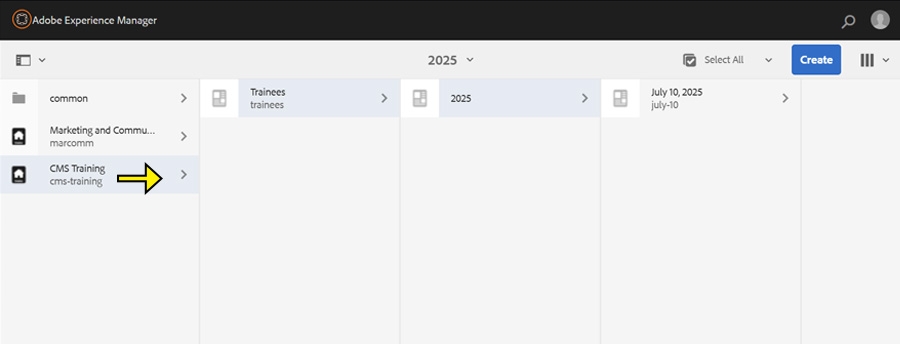
Once inside the Sites area, you’ll see a folder-based structure. Each website you have access to will be listed as a top-level folder.
From here, you can open folders to view and manage your site pages.
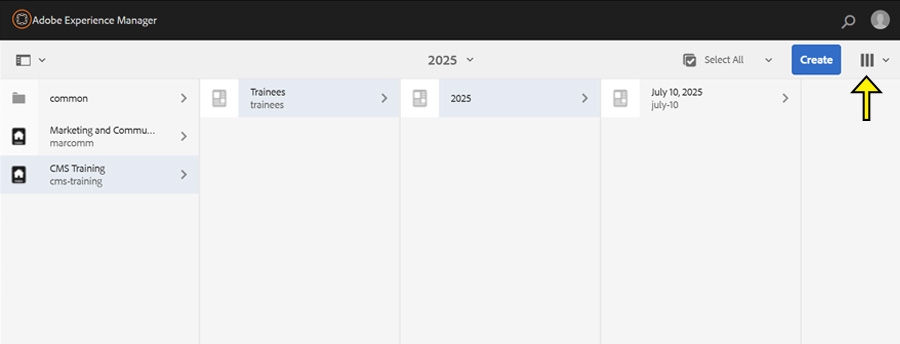
In the top-left corner of the Sites area, you’ll see a small icon that looks like three stacked lines. This is called the View Menu.
Use this menu to switch between different ways of viewing your site structure:
Column View (default): Shows folders and pages from left to right as you navigate deeper
Card View: Displays items as visual cards with page details
List View: Arranges pages in a list with helpful info like last modified date
Tip: Most users find Column View easiest to use when starting out.
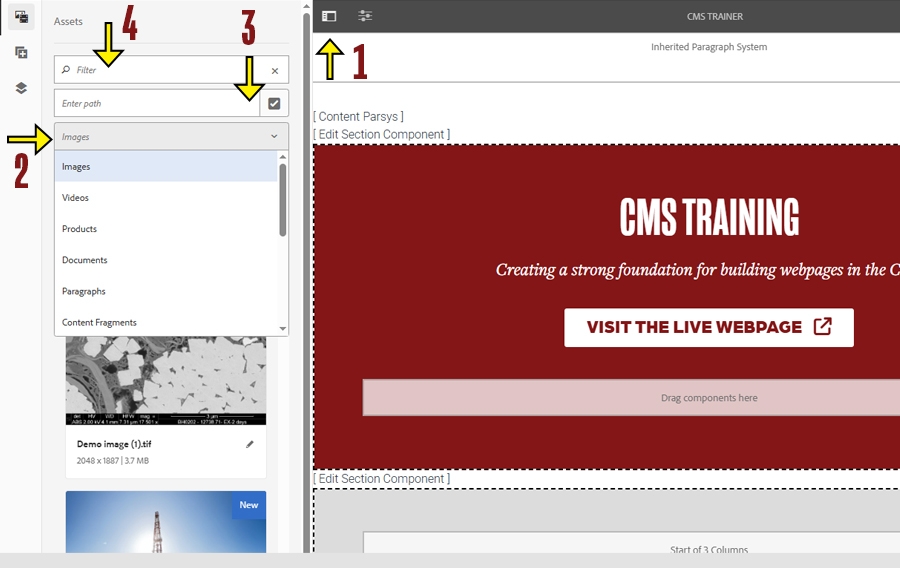
When you have a page open for editing, you can easily find Assets you've uploaded to the Digital Asset Manager (DAM)
At the top of the screen, you'll see a dark grey bar with two icons. You can hover over each icon to see its name.
Toggle Icon
Click the square icon to open or close the side panel. This panel gives you access to all assets stored in the Digital Asset Manager (DAM). Once the panel is open, you'll see a list of available assets.
Dropdown List
By default, the list shows image files. Use the dropdown menu to switch the view to Documents if you're looking for PDFs, Word files, or other non-image assets.
Enter Path Field
If you know the exact folder where your asset is stored, use the Enter Path field. Click the checkmark icon to browse to a specific location in the DAM.
Filter Field
If you know the full or partial name of your file, use the Filter field to search. This can save time and help you find your asset quickly without browsing through folders.
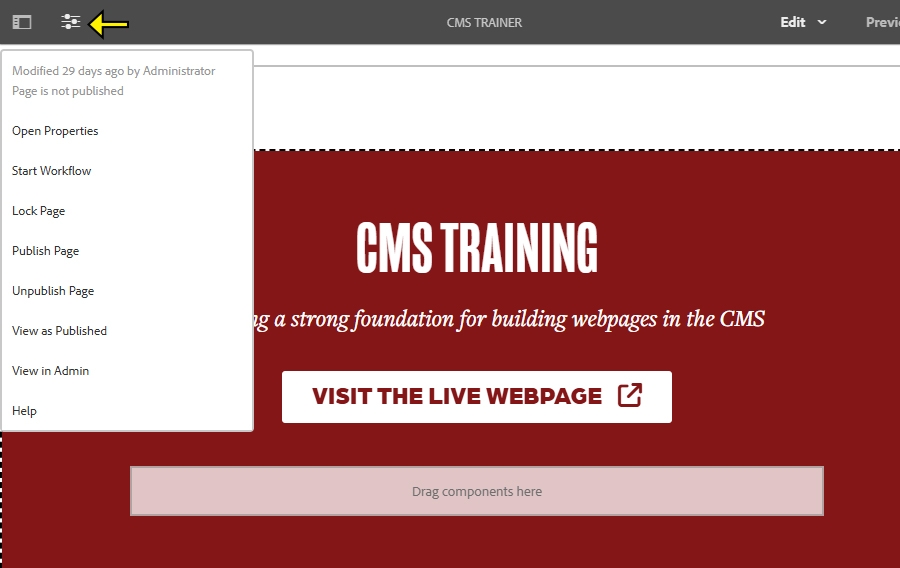
With your page open for editing, look at the dark grey bar at the top of the screen. You'll see two icons. Hover over each one to see its name.
Three Sliders Icon
This opens the Page Information menu, which contains useful options for managing your page.
The main options you'll use include:
Publish
Pushes the page and any recent changes to the live website.
Unpublish
Deactivates the page and removes it from the live website.
View as Published
Lets you preview how the page will look in a browser once it's live.
Navigate to the Sites area in the CMS
From the AEM homepage, click Sites in the top navigation.
Browse to the appropriate location
Use the folder structure to find where your new page should live.
Click the checkmark icon next to the folder name.
This reveals a toolbar at the top.
Select “Create” from the toolbar
Choose Page from the dropdown menu.
Choose a template
Select the OU-Material Base Template, then click "Next"
Enter the Page Information
Title
This is the display name of the folder in AEM.
Name
Leave this field blank to let the system automatically generate a compliant SEO-friendly URL. (Recommended)
If you need to create a specific URL, you can enter it manually here. Follow These guidelines:
Click “Create”, then choose “Open” to begin editing the new page."
Header iParsys
This section holds elements that appear at the very top of the page, such as the site logo, page title, or banner image. It may also include global elements that appear on every page.
Nav Bar iParsys
This area contains your main site navigation, such as links to other pages, dropdown menus, or navigation components.
Breadcrumb Parsys
This section is not currently used. Any content placed in the Breadcrumb Parsys will not function properly.
Footer iParsys
This is where you add content that appears at the bottom of every page, such as contact information, social media links, or legal disclaimers.
Page Summary
This field is used for short summaries that may appear in news listings, search results, or when sharing content on social media. It should briefly describe the page content.
Feature Parsys
This section is typically used for a visually engaging element at the top of the page. You can add an image or background image or include an embedded video (video is only allowed on homepages)
Content Parsys
This is the main area of the page. All of your standard content like text, images, components, and layout sections should be added here.
You’ll build and edit your web pages using pre-built CMS components. Visit the Components page to learn how to add them to your site and adjust their configuration settings.
To publish or unpublish your web pages you'll use the Page Information menu.
The Assets area is where you’ll manage the digital files used on your website such as images, PDFs, and other documents. These files are stored in what’s called the DAM, which stands for Digital Asset Manager.
Any time you want to upload a new photo, link to a PDF, or place an image on a page, you’ll do that through the Assets area.
In the top-left corner of the Assets area, you’ll see a small icon that looks like three stacked lines. This is called the View Menu.
Use this menu to switch between different ways of viewing your site structure:
Column View (default): Shows folders and pages from left to right as you navigate deeper
Card View: Displays items as visual cards with page details
List View: Arranges pages in a list with helpful info like last modified date
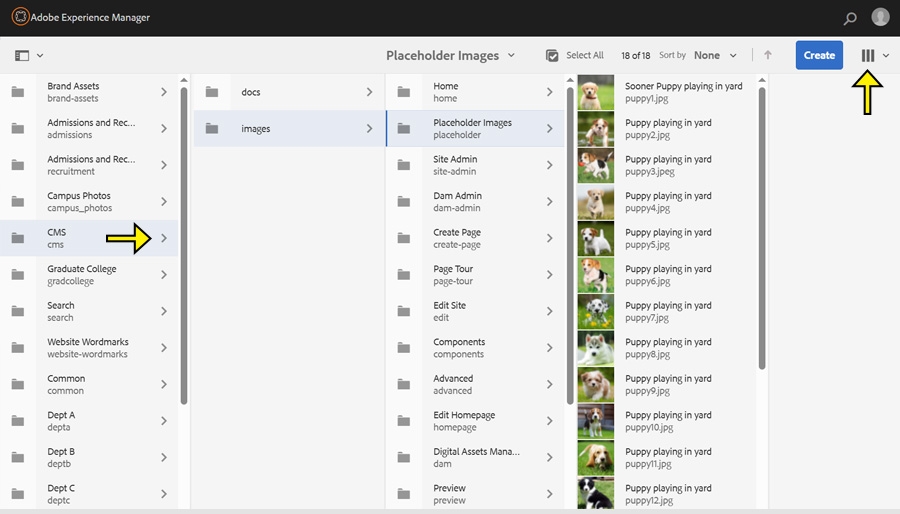
Use folders in the DAM to organize your images, documents, and other files. Good folder structure makes it easier to find assets later and keep your site clean and efficient.
Navigate to the Assets area in the CMS
From the CMS homepage, click "Assets" in the top navigation.
Browse to the appropriate location
Use the folder structure to find where you want your new document to be uploaded.
Click the checkmark icon next to the folder name.
This reveals a toolbar at the top.
Click “Create” from the toolbar
Choose Files from the dropdown menu.
Select the Document From your Computer
Browse to the file you want to upload (PDF, JPG, etc.), then click "Open."
Click “Done” to complete the process.
Your file is now available in the DAM and ready to be used on your web pages.
Tips:
Before uploading, rename your file using web-friendly formatting.
Use lowercase letters and hyphens, and avoid spaces or special characters. Example: "program-flyer-fall2025.pdf" instead of "Program Flyer Fall 2025.pdf"
Only upload the image size you need for the web.
Large image files (multiple MBs) can slow down your site. Aim for files under 500 KB when possible.
Use folders in the DAM to organize your images, documents, and other files. Good folder structure makes it easier to find assets later and keep your site clean and efficient.
Navigate to the Assets area in the CMS
From the CMS homepage, click "Assets" in the top navigation.
Browse to the appropriate location
Use the folder structure to find where your new folder should live.
Click the checkmark icon next to the folder name.
This reveals a toolbar at the top.
Select “Create” from the toolbar
Choose Folder from the dropdown menu.
Enter the folder Information
Title
This is the display name of the folder in AEM.
Name
Leave this field blank to let the system automatically generate a compliant folder name. (Recommended)
If you need to create a specific URL, you can enter it manually here. Follow These guidelines:
Click “Create”, then choose “Done” to begin editing the new page.
Your new folder will now appear in the current directory and is ready for uploads.
If you need to delete a folder or an asset inside of the DAM, please submit a ticket to the Web Team
