Skip Navigation

Bootstrap Column Control

Bootstrap Column Control Component

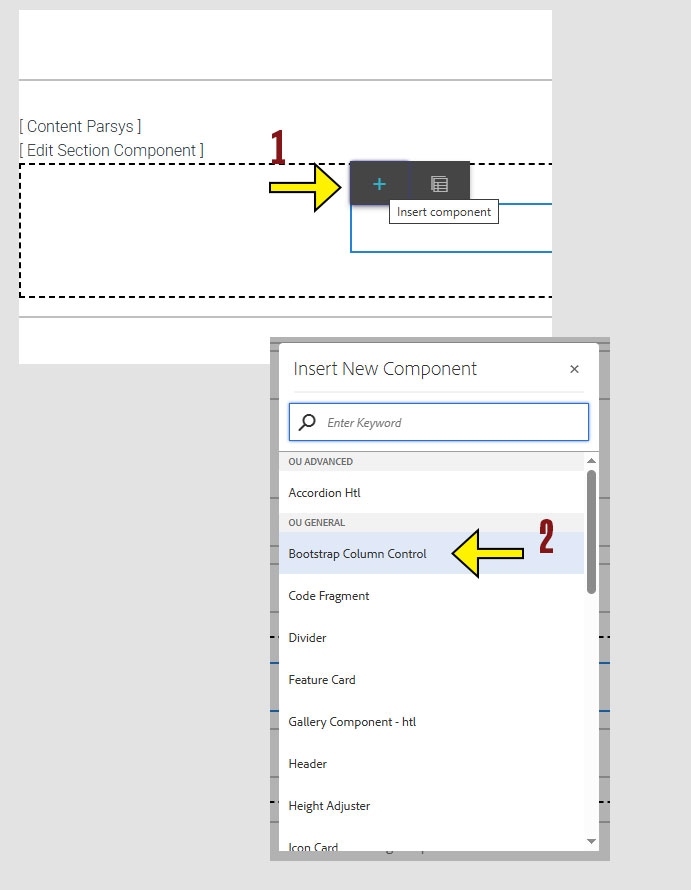
When working within the Content Parsys all web components must first be placed inside of a Section Component

Bootstrap Column Control lets you arrange content side-by-side using a flexible grid layout. It helps structure your page by dividing it into columns that adapt to different screen sizes.

Usage

  • Place two or more pieces of content next to each other
  • Create multi-column layouts for text, images, or components
  • Control spacing and layout balance across your page

Jump to Topic


How to Add the Component

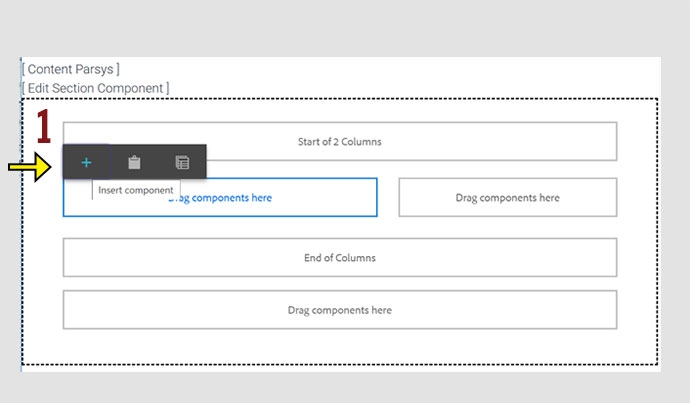
Click within a section component to insert new components.

  1. Click the + icon.

  2. Choose Bootstap Column Control.
arrow pointing to the + icon on the component menu and another arrow pointing to the Bootstrap Column Control option on the insert new component menu

How to Configure the Component

  1. To start using the component, click anywhere on the component and a menu will appear.

  2. Click the wrench icon to enter configure mode.
An arrow pointing to the wrench icon on the configure toolbar.

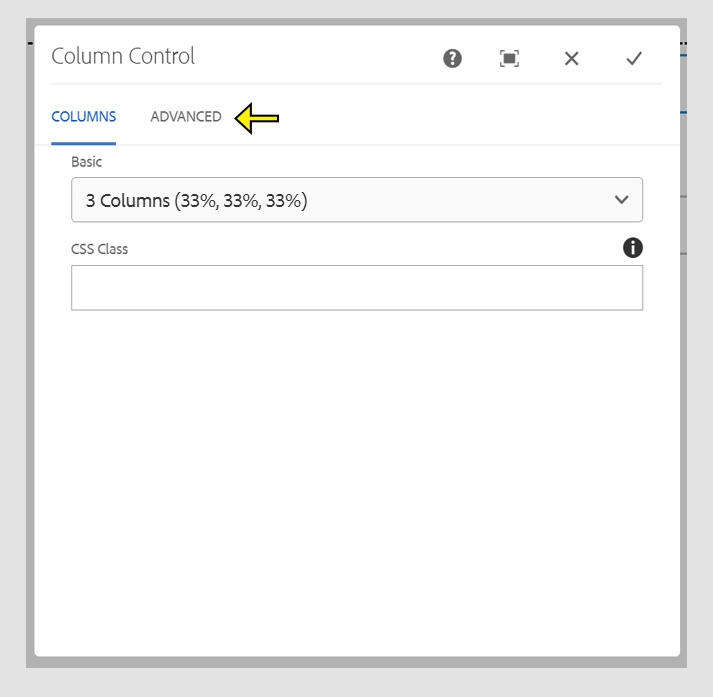
When the Configure options appear, you will see two sections:

  • Columns
    Choose from a list of preset layout options, such as 50/50 or 33/66 column splits. This is a quick way to apply a balanced layout without manual setup.

  • Advanced
    Create a custom layout by defining your own column sizes. This option gives you more flexibility and control over the page structure.
CMS Column Control screen with and arrow highlighting the "Columns" and the "Advanced" tabs.

Working within the Component


Basic Columns

  1.  Click the dropdown menu under the Basic heading to choose how many columns you want to display.

  2. Click the check mark to save your changes and close the window. To cancel without saving, click the X.

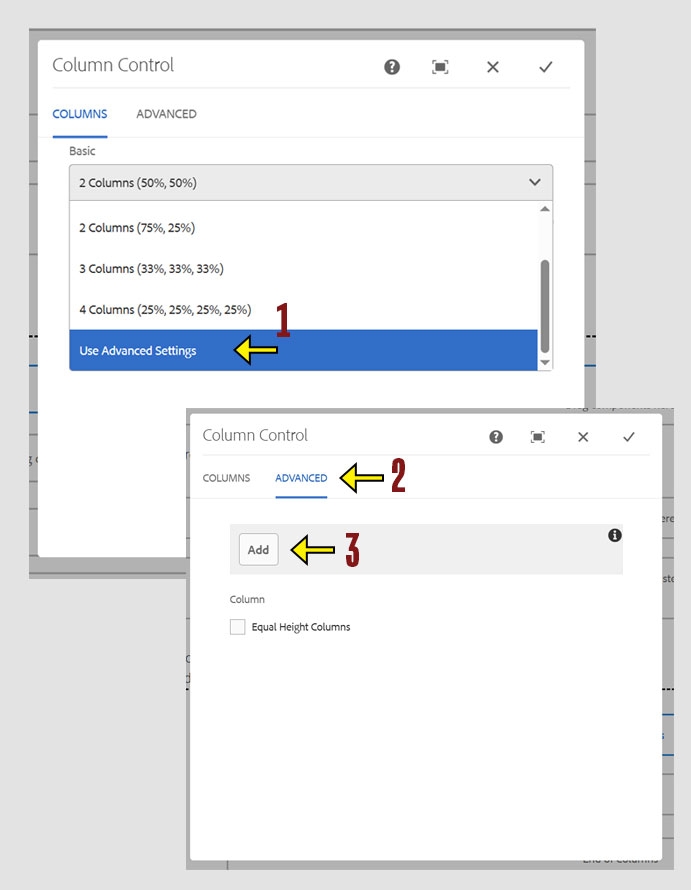
Note: Even if  "2 columns (50%, 50%)" appears selected, you must actively select it again before clicking the check mark to save your changes.

CMS Column Control screen with and arrow highlighting the dropdown list for choosing a column layout along with the check mark for saving changes.

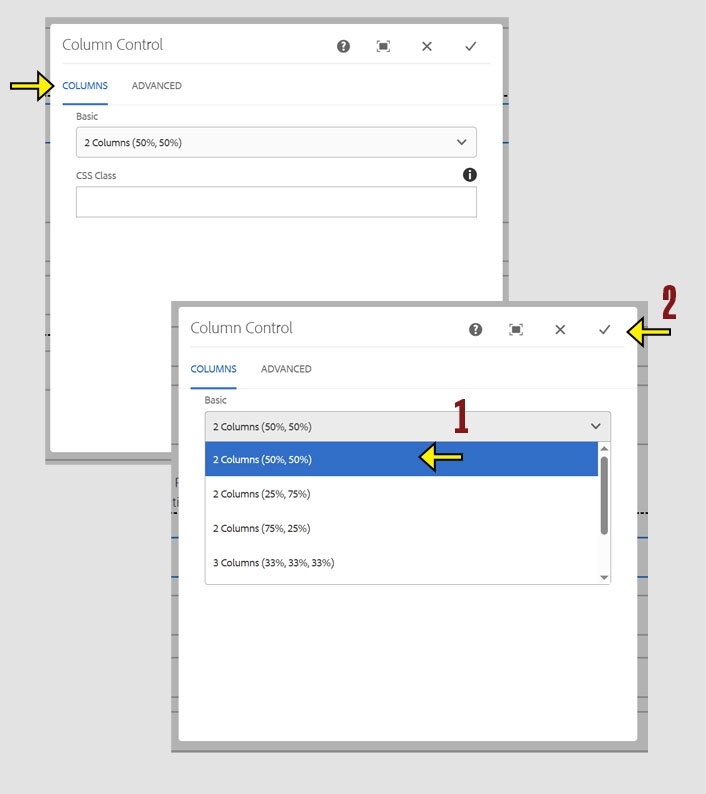
Once you choose the layout that you want you can begin adding components into the columns. 

Click within a column to insert new components.

  1. Select the + icon and choose the component you want to add.
CMS screen showing that clicking within the column layout will display the toolbar to insert a new component.

Advanced Columns

  1. To access advanced settings, select “Use Advanced Settings” from the dropdown under the Basic heading.
    Tip: This is the last option in the list, and you may need to scroll down to find it.

  2. After selecting “Use Advanced Settings,” click the Advanced heading to view the available settings.

  3. Click the Add button to create as many columns as you need.
CMS Column Control screen showing the "Use Advanced Settings" option in the Basic layout dropdown. This enables the "Advanced" tab with Add button

Advanced Column Settings

The Column Control allows a maximum total of 12 units. To format your layout, divide the 12 units across your desired number of columns. For example, a 5 and 7 split creates two columns at approximately 40% and 60%.

  1. Click the Span dropdown to choose a width for your first column. Leave Offset set to “No Offset.” 

  2. Repeat this step for each column until the layout matches your desired design. Make sure the total span of all columns adds up to 12.

  3. You can drag columns up or down to change their order or delete any you do not need. 

  4. When you're satisfied with your layout, click the check mark to save your changes. To cancel without saving, click the X.
CMS column control screen showing the use of dropdown lists for setting the Span size. Icons for move and delete are also highlighted along with the check mark for saving changes.

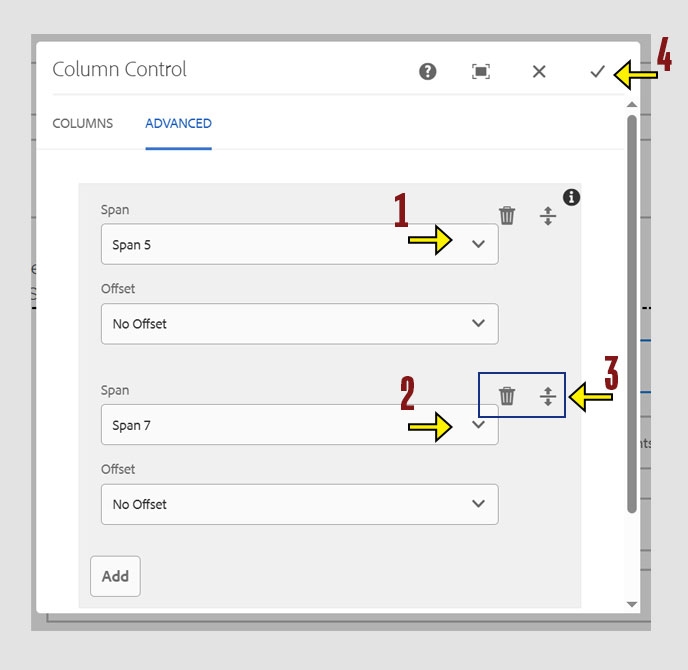
Once you hav configured the columns you want to use for the layout you can begin adding components into the columns. 

Click within a column to insert new components.

  1. Select the + icon and choose the component you want to add.
CMS screen showing that clicking within the column layout will display the toolbar to insert a new component.

Column Collapse & Mobile Views

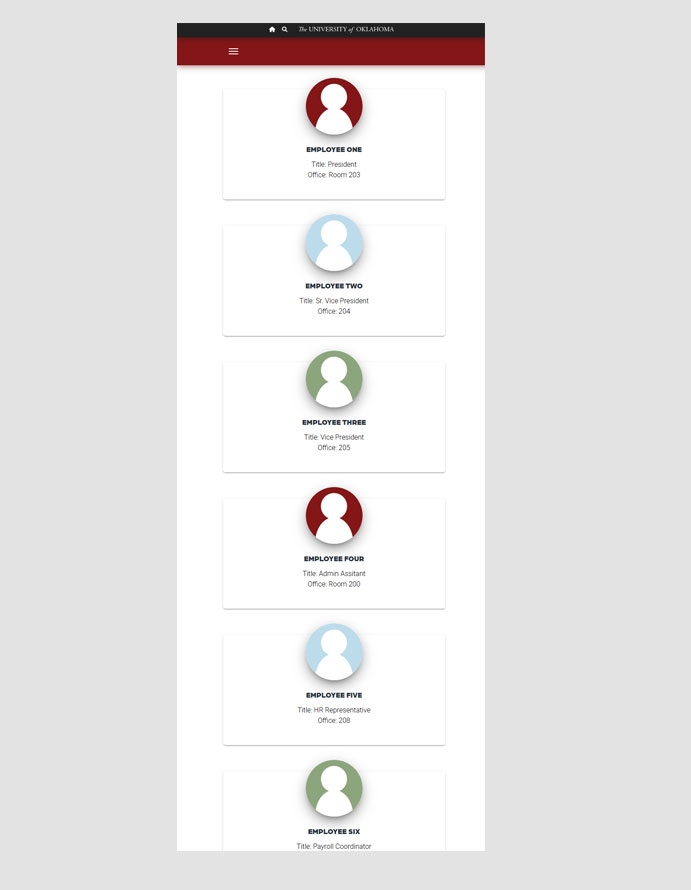
On mobile devices, all column layouts collapse into a single vertical stack. Columns appear in order from left to right, top to bottom. To maintain correct order and layout, you must start a new Column Control for each row. Skipping this step will cause columns to display out of order on mobile.

CMS screen showing that each row of content needs to have its own column control. Arrows highlight the beginning and end of each column control.

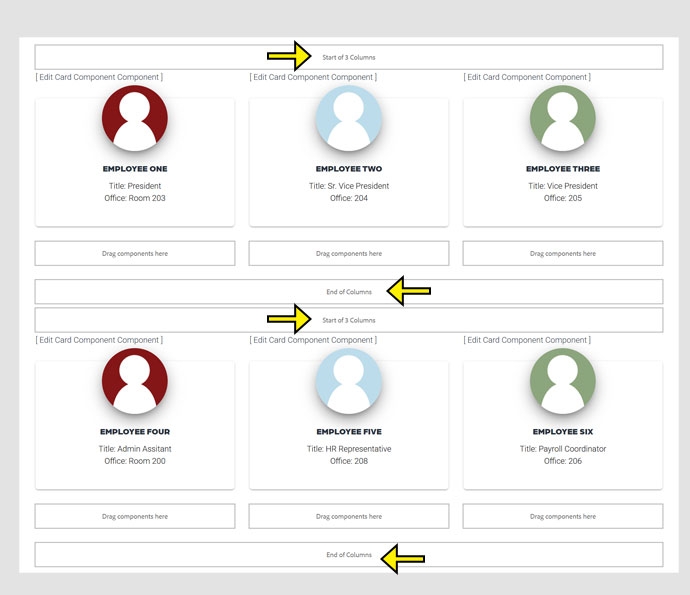
This example demonstrates how multiple rows of columns stack vertically when viewed on a mobile device.

To preview how your content appears on mobile devices, move your mouse to the right edge of your browser window until a double arrow appears. Then click and drag the edge to the left to resize the window.

A demonstration of how the columns collapse to one long column on a mobile view.