Uploading & Downloading Files via Secure Copy
PLEASE NOTE THAT, FOR SECURITY REASONS, YOU CAN UPLOAD AND DOWNLOAD FILES FROM OSCER RESOURCES VIA SECURE COPY AND SECURE FTP ONLY.
Table Of Contents
Windows
(A) MobaXterm
If you're using MobaXterm, this should feel very natural and intuitive.
1. Installing MobaXterm and Logging in to schooner
- Please follow step 1, 2, and 3 in the instruction of how to access OSCER on Windows via MobaXterm.
2. Downloading Files from OSCER to Your Local PC / Laptop
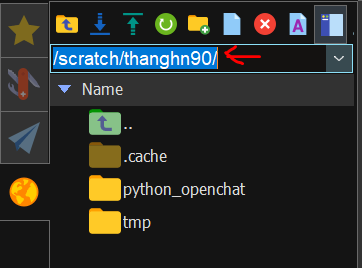
- After you logged in to schooner, you can use the left panel of MobaXterm user interface to browse your files on OSCER. The top of the left panel is the address bar showing the path where you are currently browsing.
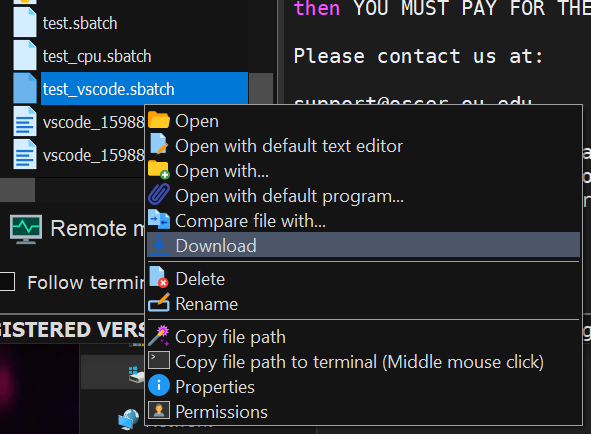
- To download files and/or directories, select them on the left panel. You can select multiple files and directory at once. Then right click and choose "Download".
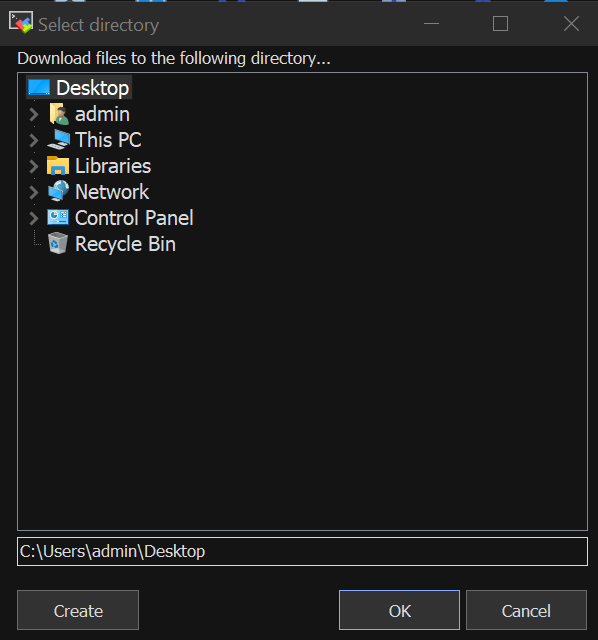
- Choose the location where you want your selected files to be downloaded to, and click OK.
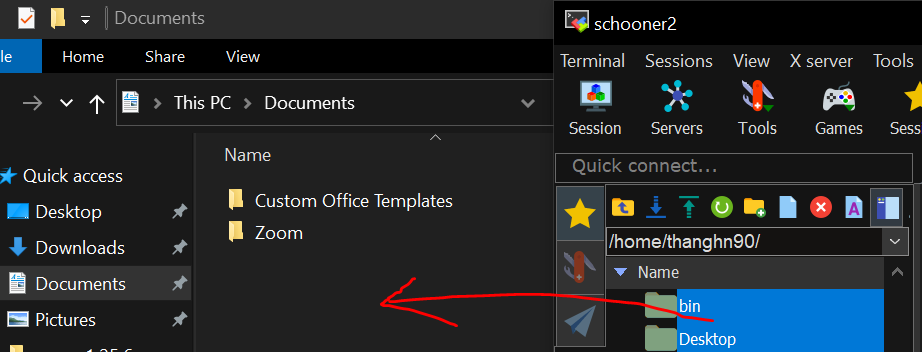
- Alternatively, you can perform drag-and-drop downloading: open the destination folder in your local PC / laptop with Windows File Explorer where you want the selected files to be downloaded. Then, use the left mouse to drag the selected files/directories from the left panel of MobaXterm to the Windows File Explorer.
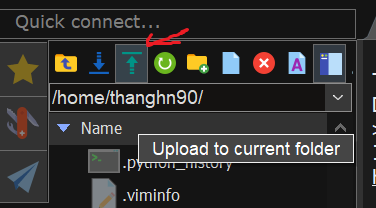
3. Uploading Files from Your Local PC / Laptop to OSCER
- To upload files from your local PC / laptop to OSCER, first navigate to the destination directory on OSCER where you want your files to be uploaded to.
- Then click on the "Upload to current folder" icon.
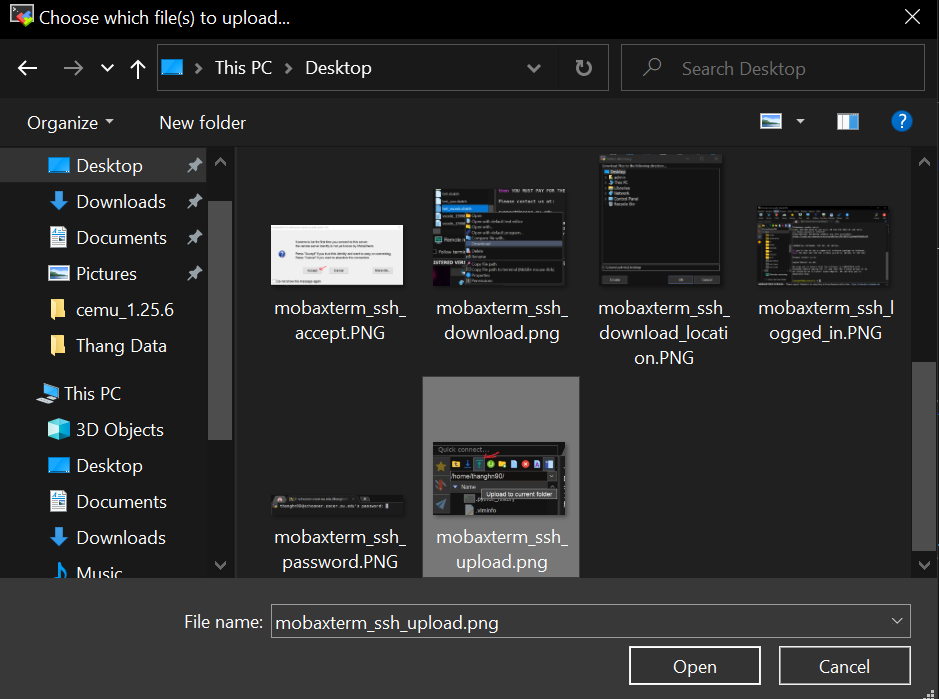
- Select the file(s) you want to upload. You can select multiple files at once, but NOT an entire folder. Then click "Open".
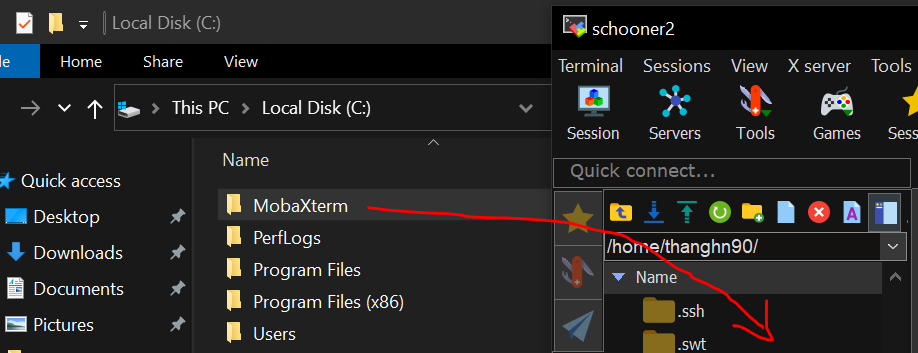
- Alternatively, or in case you need to upload entire folders, you can perform drag-and-drop uploading. First, use Windows File Explorer to navigate to the location of the files/folders you want to upload, and select them. Then, use the left mouse to drag the selected files/folders to the left panel of MobaXterm. The selected files/folders will be uploaded to the path currently showing in MobaXterm left panel.
(B) FileZilla
When it comes to uploading/downloading speed, FileZilla is currently on the top of the list. It supports parallel (multithreaded) file transfers by default, and it's open source and completely FREE.
1. Downloading and Running FileZilla
- Navigate to https://filezilla-project.org/download.php?show_all=1.
There are two ways to install and run FileZilla:
(a) Via an installer
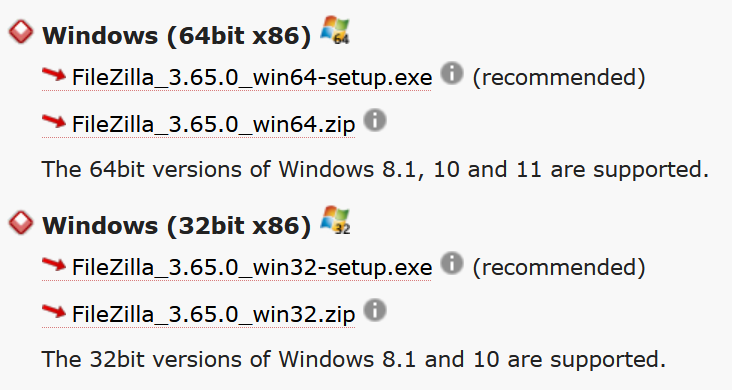
- Once you downloaded the setup.exe installer for FileZilla (
FileZilla_3.65.0_win64-setup.exeas of this writing), double click on it to run the FileZilla installer.
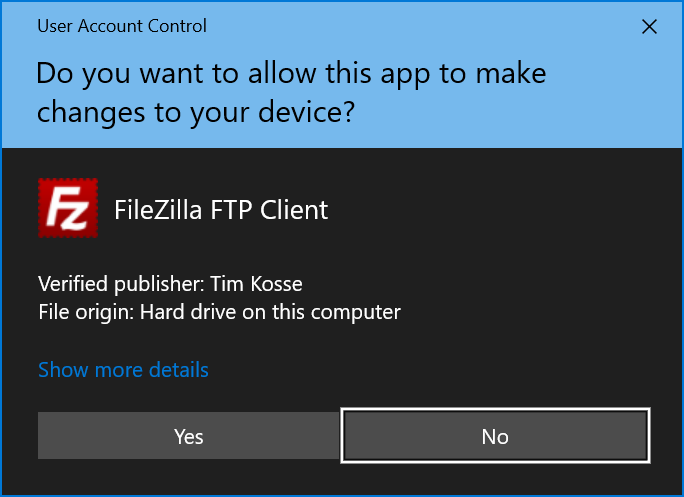
- If you have administrative privilege, click "Yes" when a User Account Control (UAC) dialog pops up. Otherwise, click "No".
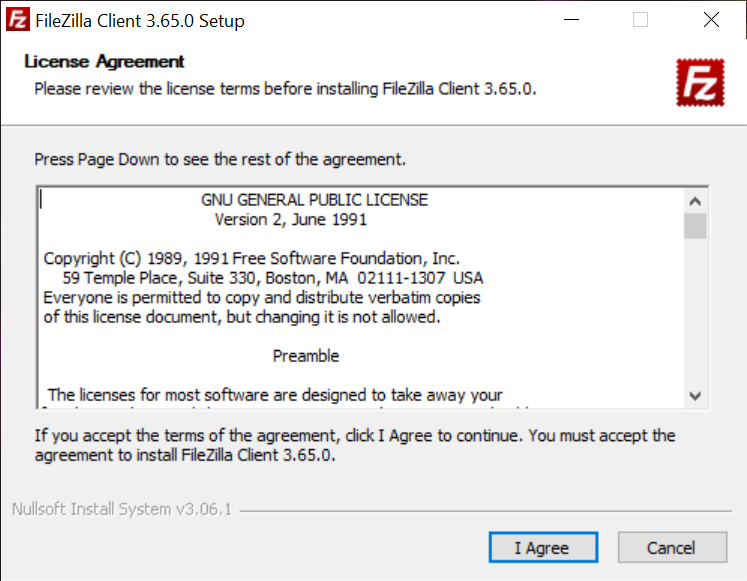
- Click "I Agree" button.
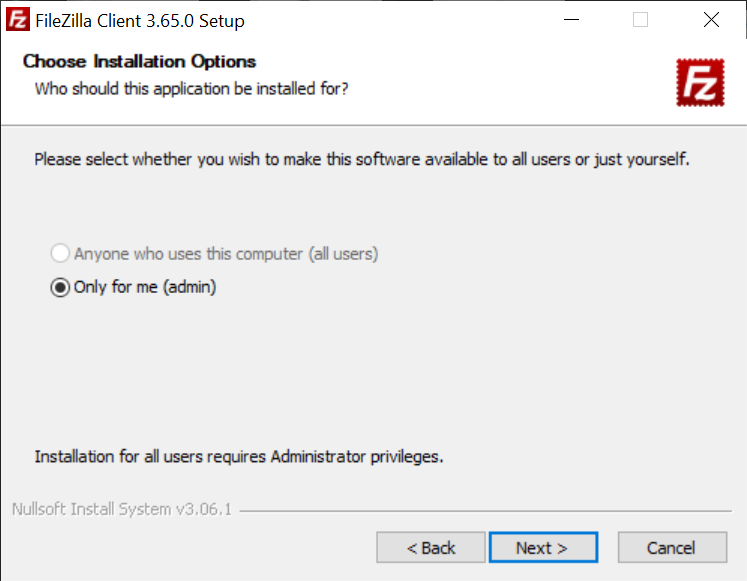
- If you click "Yes" to the UAC dialog above, you can either install FileZilla for all users or just your account.
If you click "No" to the UAC dialog above, you can ONLY install FileZilla on your account.
Click Next.
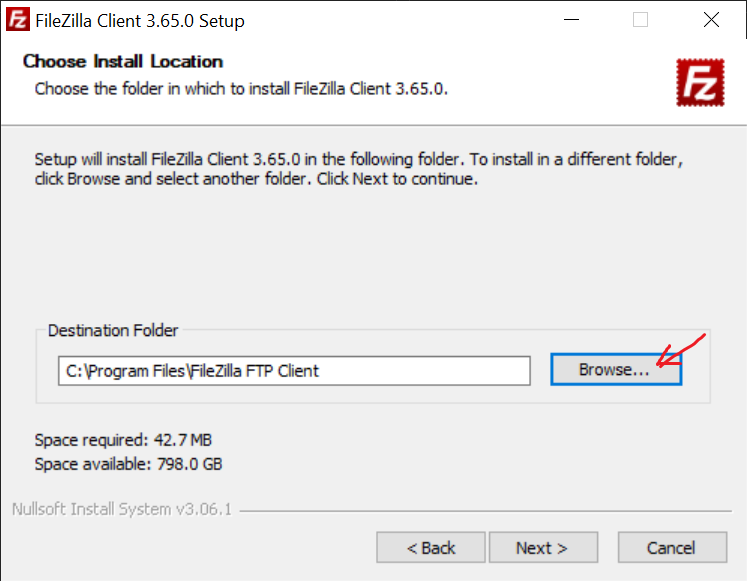
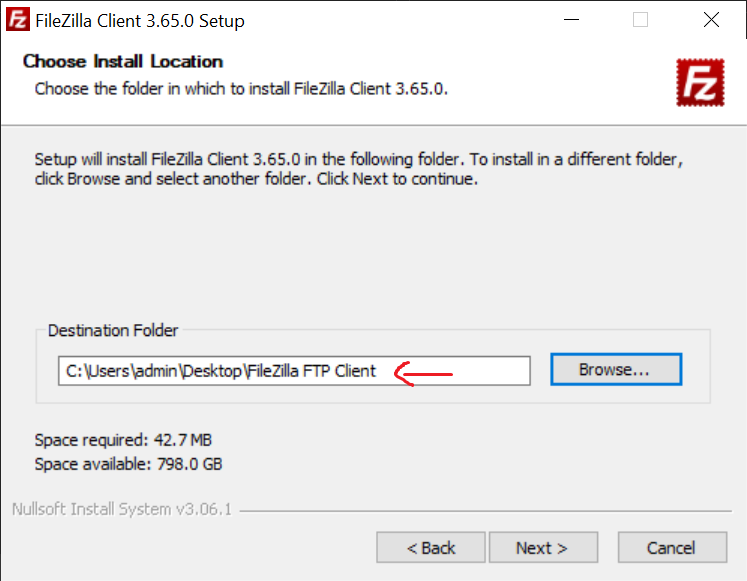
- By default, FileZilla will be installed to
C:\Program Files. If you click "No" to the UAC dialog above, you MUST change the destination folder by clicking the "Browse" button and browse to a folder where you have write access to it (such asDesktop). Then, click Next.

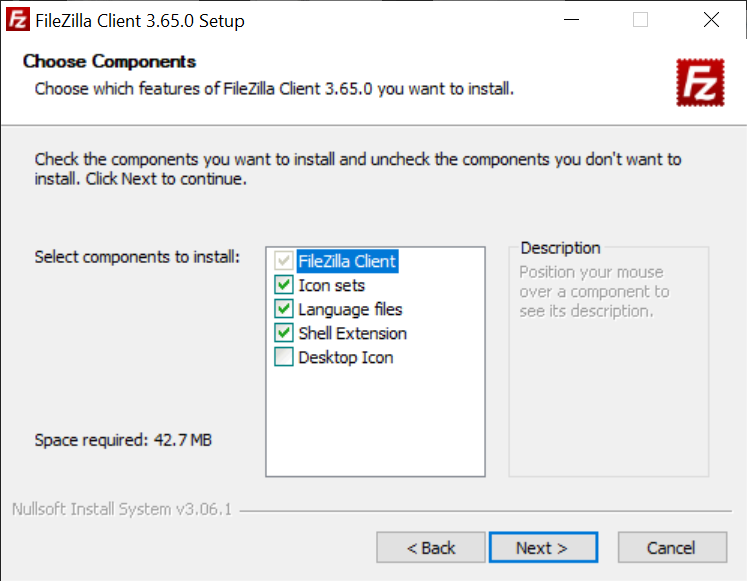
- Choose which components you want FileZilla to install, and click Next.
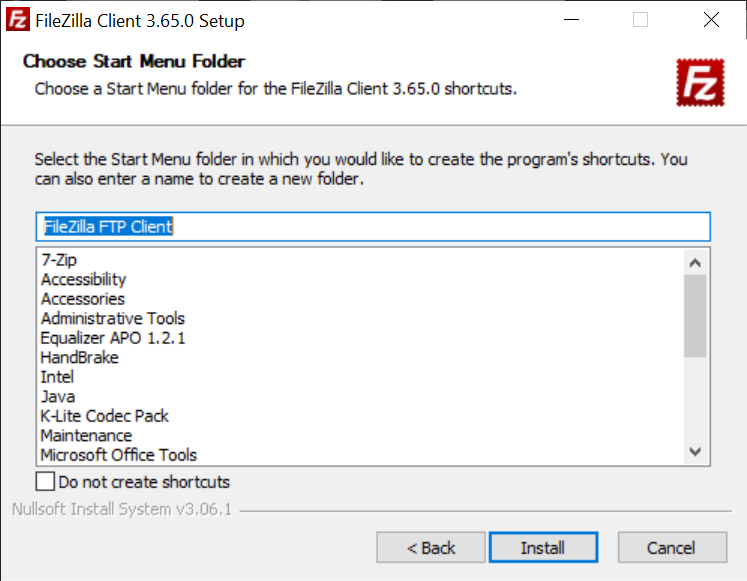
- By default, the installation will automatically create a start menu for FileZilla. Click "Install" to start the installation process.
- Once the installation is finished, click "Finish". By default, FileZilla will automatically be started.
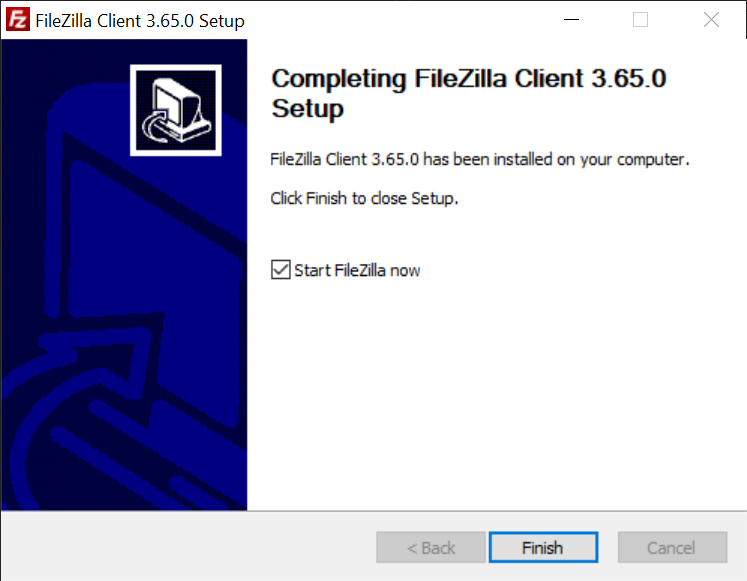
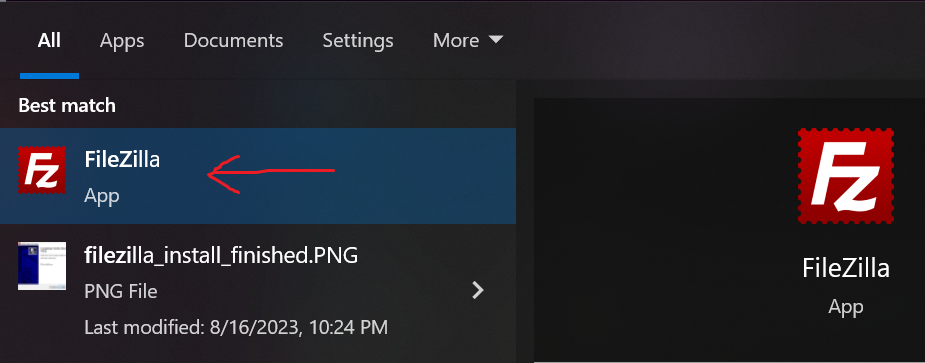
- For future runs of FileZilla, please go to the Start menu, type
filezilla, and click on the FileZilla app start menu icon.
(b) Via a zip package
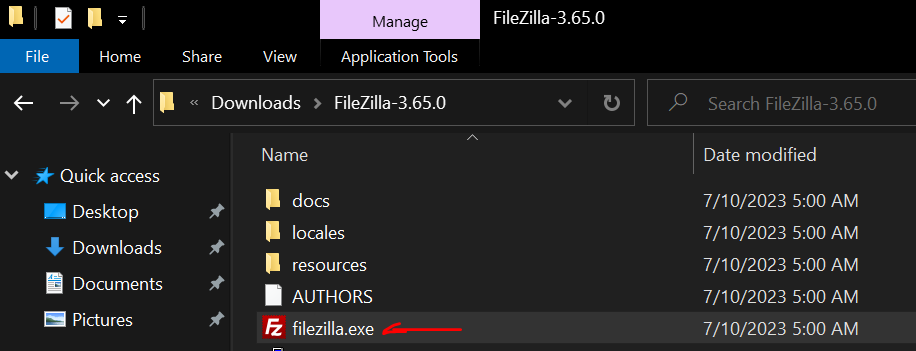
- If you choose to download the zip package instead, extract it and double click on the
filezilla.exeexecutable file to run FileZilla.
2. Connecting to OSCER using FileZilla
- Near the top of the FileZilla user interface, specify the followings:
- Host:
schooner.oscer.ou.edu - Username: your OSCER username
- Password: your OSCER password
- Port:
22
- Host:
- Then click the Quickconnect button.

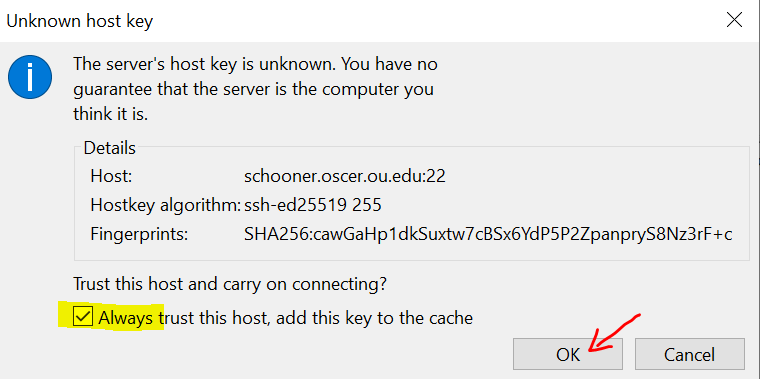
- The first time you connect to OSCER using FileZilla, a pop-up window will appear, asking you to trust schooner remote host. Please check "Always trust this host, add this key to the cache" box, and click the OK button.
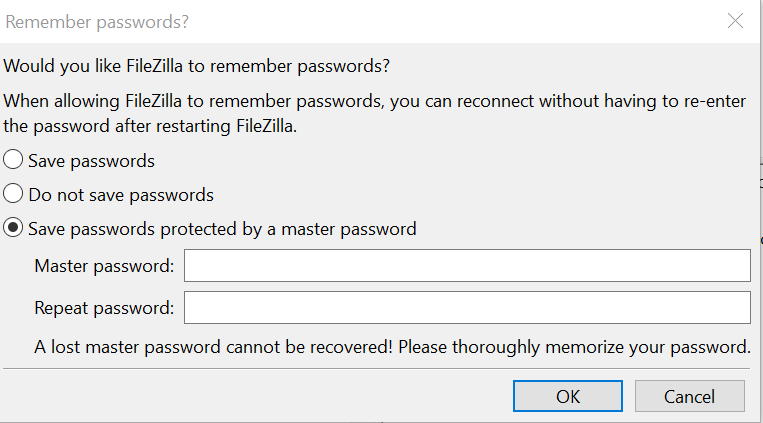
- By default, FileZilla will ask whether you want to it to save the password for your account. As a security precaution, we do not recommend doing so. However, if you still insist FileZilla to save your password for you, please select option 3: "Save passwords protected by a master password". Then specify a "master" password just for FileZilla to encrypt and store all your remote passwords. This "master" password should be a DIFFERENT password than your OSCER password.
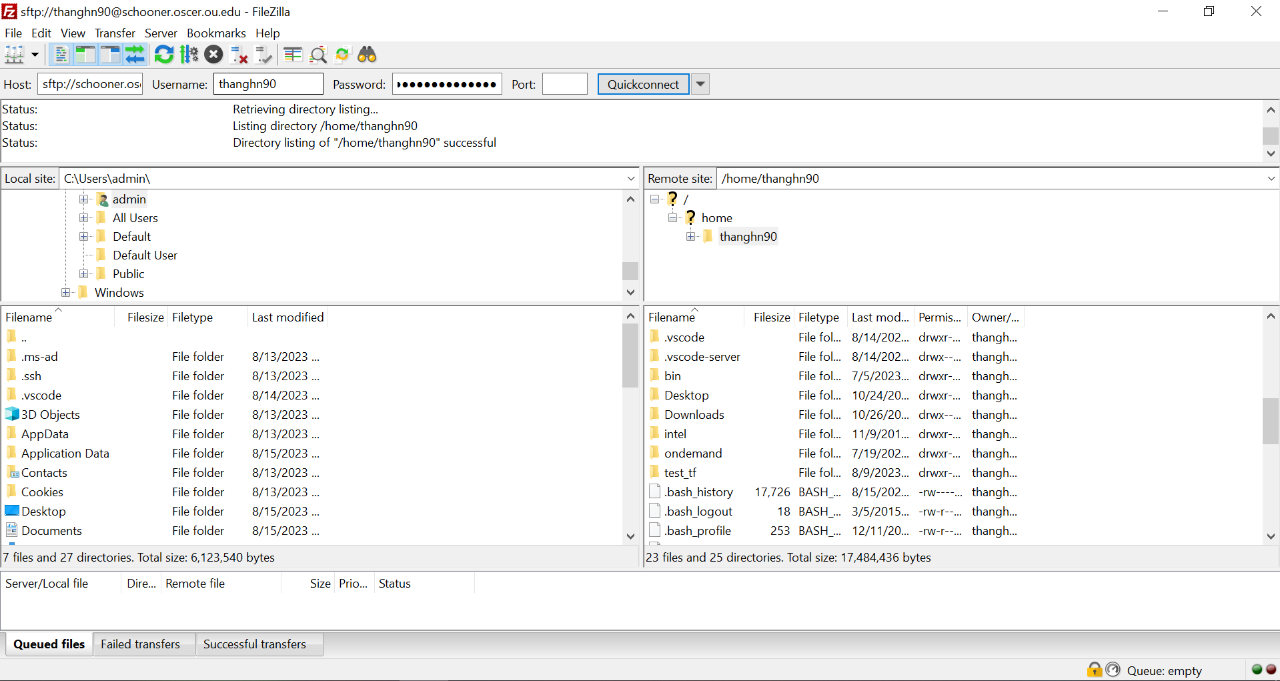
- The image below shows a typical FileZilla user interface after you have successfully connected to OSCER.
- The top part shows the status of connections and file transfers.
- The left side show the directory structure and file structure in your local PC / laptop.
- The right side show the directory structure and file structure of your account on OSCER.
- The bottom part will show the file transfer status while you are uploading/downloading.
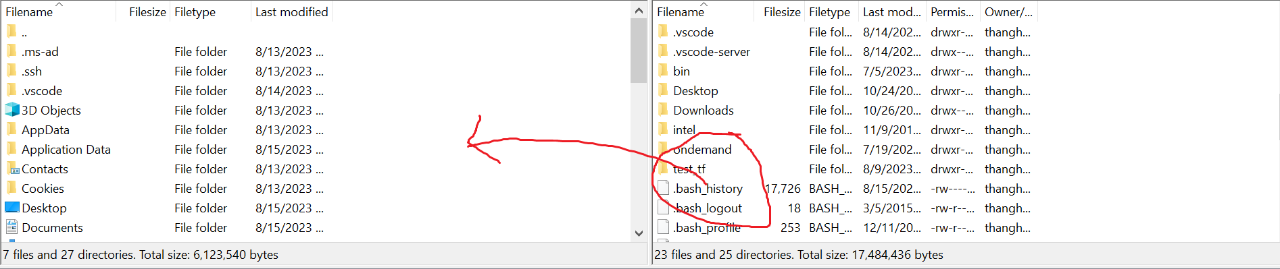
- To download files and folders from OSCER to your local PC / laptop, select and highlight them on the right panel, then user your left mouse to click and drag them from the right to A BLANK AREA on the left panel. Your selected files and folders will be downloaded to the current local directory showing on the left panel.
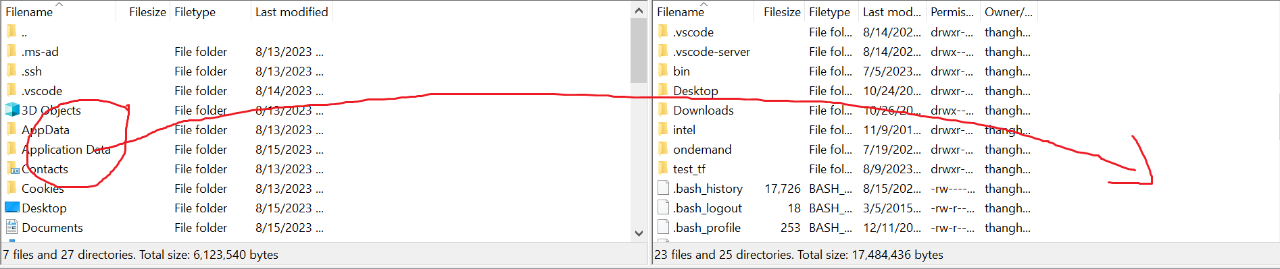
- To upload files and folders from your local PC / laptop to OSCER, select and highlight them on the left panel, then user your left mouse to click and drag them from the left to A BLANK AREA on the right panel. Your selected files and folders will be uploaded to the current remote directory showing on the right panel.
3. Closing FileZilla
- When you close FileZilla, your connection to oscer will be automatically closed and saved.
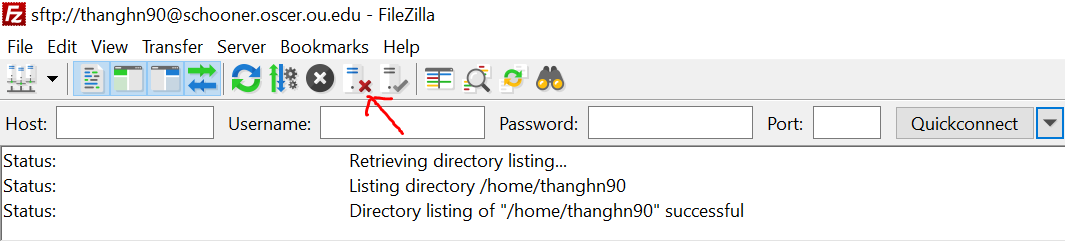
- To close the remote connection without closing FileZilla, click on the "Disconnect from currently visible server" button.
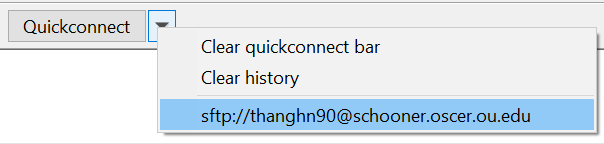
- By default, after closing a remote connection, the remote connection configurations are saved so that next time you open FileZilla, simply click the dropdown icon next to the "Quickconnect" button and choose your connection again, without the need to reenter the host, username, and port again.
(C) WinSCP
If you need some special features not offered by MobaXterm nor FileZilla, such as duplicating/synchronizing files between TWO REMOTE servers, WinSCP is your best bet.
1. Installing WinSCP ON YOUR OWN PC
- Point your browser to the WinSCP download page: http://www.winscp.net/
- Near the top of the window, click on Download.
- Scroll down to the most recent version of WinSCP that ISN'T labeled "alpha" or "beta" or "FAR Plugin."
- Immediately below the version number, click on Installation package.
- This will pop up a window to download the installation wizard, so choose to save it to your desktop (or wherever you like). When it's done downloading, you may need to click Close.
- Go to where you downloaded the file to. You'll find an icon named either winscp###setup or winscp###setup.exe (except ### will actually be the version number). It'll look like a little computer and a CD.
Or, your browser may offer you a link to the file automatically. - Double-click on the winscp###setup icon. This will start the installation wizard.
- Follow the directions in the setup wizard. You'll probably be happiest with the Explorer-like interface.
- After you've completed the installation, delete the winscp###setup file, either by moving it to your Recycle Bin, or by right clicking on it and selecting Delete from the menu.
2. Running WinSCP
- To run WinSCP, just double-click on the WinSCP icon on your desktop.
- This will pop up the WinSCP Login window. In the upper left, click on Session, which will take you to the Session section.
- In the text box under Host name, type the name of the computer you want to move data to or from (for example, schooner.oscer.ou.edu).
- In the text box under User name, type your username.
- DON'T TYPE YOUR PASSWORD IN THIS WINDOW! Storing passwords on your PC entails BIG SECURITY RISKS.
- Under Protocol, select SCP.
- If you want to save this combination of host name and username, click Save. This will pop up a window titled Save session as; click OK.
- Click Login.
- If a window pops up that says something about the "host key" (or any yes/no question), click Yes.
- A popup window will request your password for the machine that you're SCPing to. Enter it and click OK (or press the Enter key).
- You'll now get a popup window that looks very similar to a regular Windows folder. You can move files to and from this window very much like how you move files to and from a regular Windows folder, except that, when you move a file, you may be asked whether to copy the file. Click Copy.
(D) PSFTP
- Point your browser to the PuTTY download page: http://www.chiark.greenend.org.uk/~sgtatham/putty/download.html
- Go to the first section of downloads, labeled Binaries and go to the For Windows on Intel x86 section.
- Right click on "psftp.exe," and from the menu select "Save Link As" (or something similar).
- Save "psftp.exe" to your Windows desktop.
- Now you can run PSFTP just by double-clicking on the PSFTP icon on your desktop.
- Here's how to get a file from, for example,
schooner.oscer.ou.eduto your desktop. What you type is incomputer font.psftp>
open schooner.oscer.ou.edu
[or the name of any of the OSCER machines]login as:
yourusername
[Replace yourusername with your username.]Store key in cache? (y/n)
yyourusername@schooner.oscer.ou.edu's password:
[Type your password; it'll be invisible as you type it.]psftp>
cd directory_where_your_file_is_stored
[Note that you'll replace this with the appropriate directory name.]psftp>
lspsftp>
get yourfilename
[Note that you'll replace this with the appropriate filename.]psftp>
quit
The file should now be on your desktop.
Mac OS X
1. Using FileZilla
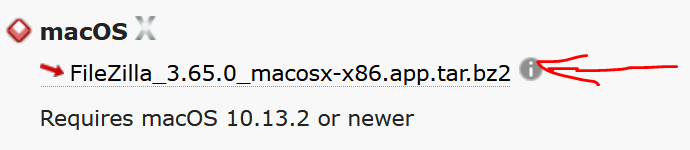
- If you prefer a GUI-based file transfer application, please download FileZilla for MacOS at https://filezilla-project.org/download.php?show_all=1.
Note that you will need MacOS 10.13.2 (High Sierra) or higher, as mentioned in the FileZilla download website.
- Simply extract the downloaded package and double click to run FileZilla app. Then follow step 2 and step 3 of the FileZilla instruction for Windows.
2. Using scp Terminal Command
- You can also use the scp command on Mac OS X from the Unix command line.
- The format of the scp command is:
scp SOURCE TARGET
Usually one or the other ofSOURCEandTARGETare on a remote machine. - Here's how to copy a file from
schooner.oscer.ou.eduto your Mac:
On your Mac, having not connected to Schooner, type
scp yourusername@schooner.oscer.ou.edu:directory_where_your_file_is/yourfilename .
whereyourusernameis your username andyourfilenameis the name of the file that you want to copy.
Be sure to include the period.at the end of the command!
The period represents theTARGETof the scp, and it is interpreted as the current working directory on your Mac (since you ran the command on your Mac, not on Schooner). - Here's how to copy a file from your Mac to
schooner.oscer.ou.edu:
On your Mac, having not connected to Schooner, type
scp directory_of_your_file/yourfilename yourusername@schooner.oscer.ou.edu:target_directory/
whereyourusernameis your username andyourfilenameis the name of the file that you want to copy.
Unix / Linux
1. Using FileZilla
- If you prefer a GUI-based file transfer application, you can install FileZilla using your Linux distro's application package manager.
For example, in Ubuntu/Debian-based distros, type:
 sudo apt update

 sudo apt install filezilla
In RPM-based distros (i.e. Centos, RHEL, Fedora, etc...), wherednfis your package manger, type:
sudo dnf install filezilla
or if your RPM-based distro was still usingyumpackage manager:
 sudo yum install epel-release -y

 sudo yum install filezilla
- After installation is completed, start FileZilla by typing in your terminal:
filezilla &
And follow step 2 and step 3 of the FileZilla instruction for Windows.
2. Using scp Terminal Command